Required Fields
This tutorial walks you through what Required Fields are, who can use them, and how to set them up.
How to Use Required Fields
Every wildlife rehabilitation organization tracks information a little differently. Maybe your team always needs to know who rescued the animal, or you want to make sure no one ever forgets to record an exam date. The Required Fields feature lets you tell WRMD: "These fields must be filled in before anyone on my team can save a record."
What Are Required Fields?
WRMD already requires a small number of essential fields on every record — things it cannot function without. Beyond those, every other field is optional by default.
The Required Fields feature lets your organization's administrator designate additional fields as mandatory. Once a field is marked as required:
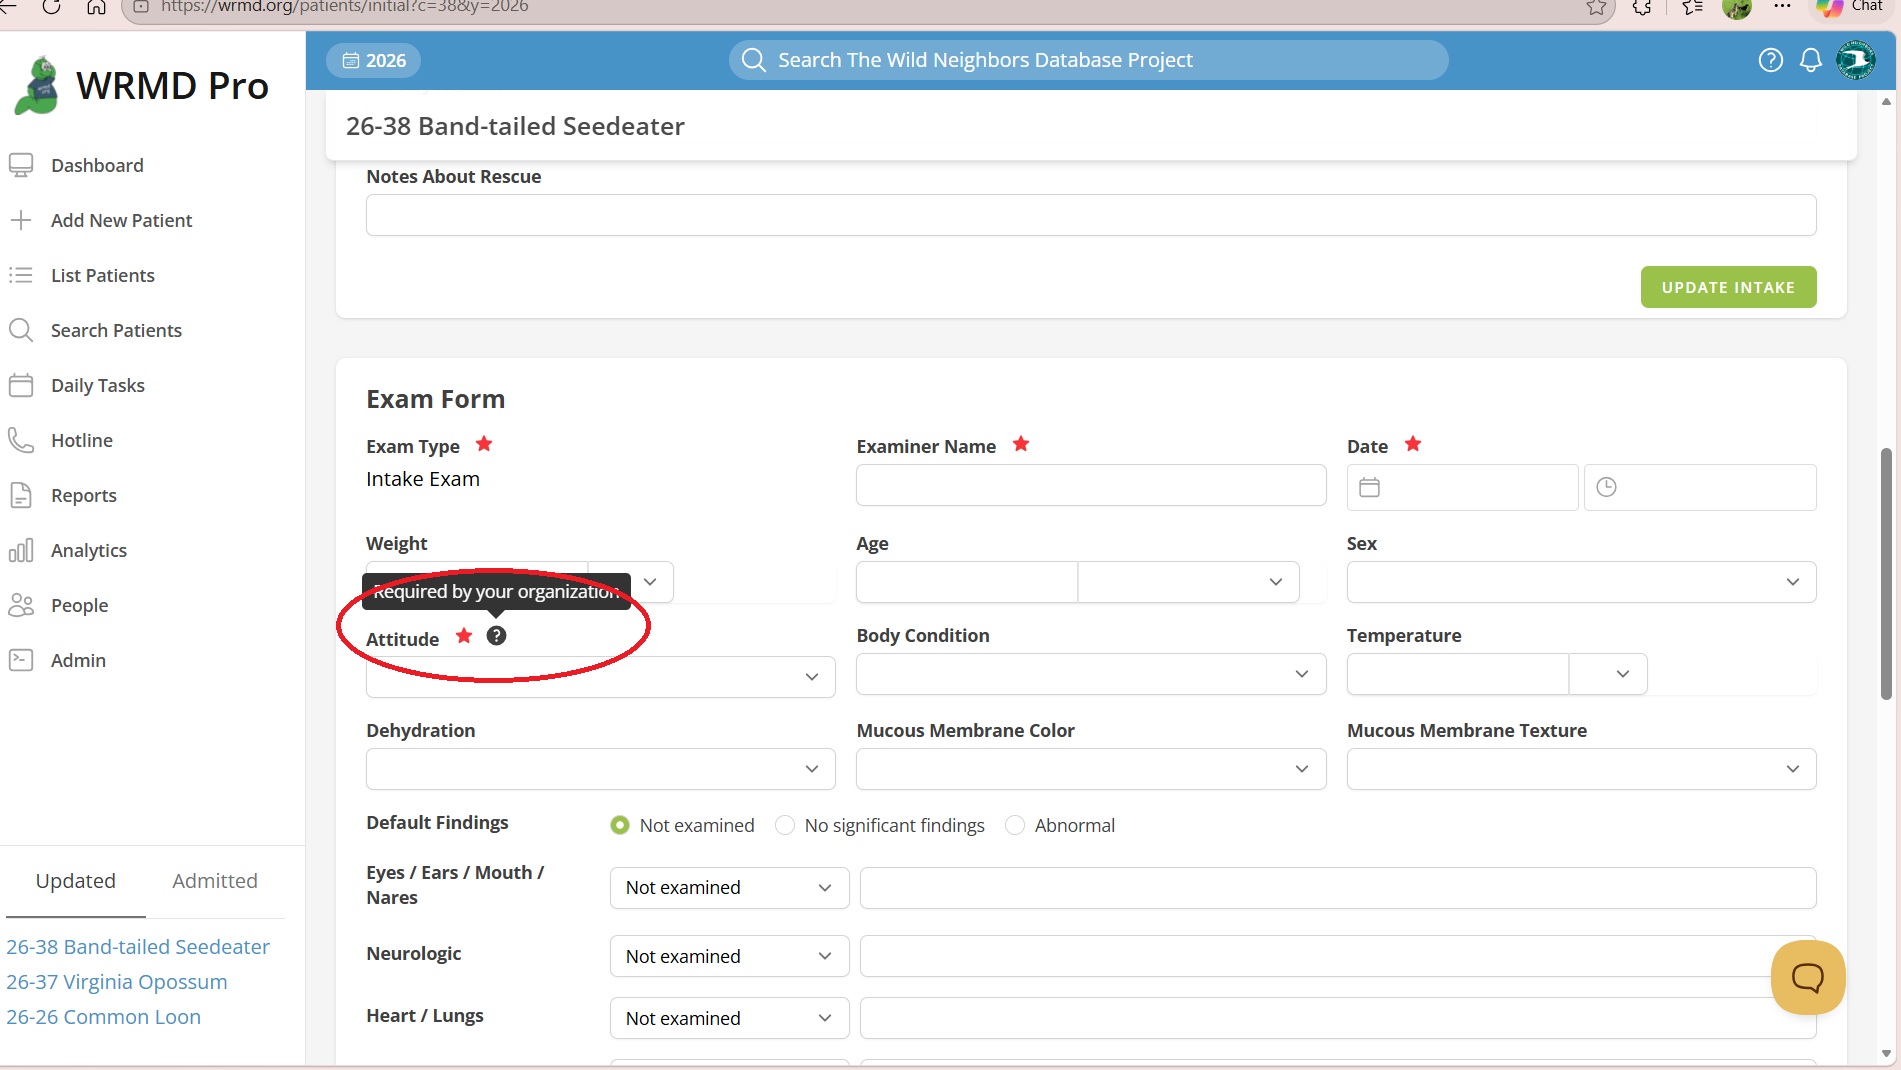
- It shows a red star next to its label on every form.
- WRMD blocks the form from saving if that field is left blank.
- A clear error message tells the user which field needs attention.
Think of it as a gentle but firm reminder for your team to capture the data your organization cares about most.
Before You Start
A few things to know:
- Pro plan only. Required Fields is available exclusively to organizations on the WRMD Pro plan. If you don't see the option in your menu, your organization isn't currently on Pro.
- Admin access required. Only users with administrator permissions can change Required Fields. Regular team members will see the red stars on their forms, but they won't be able to add or remove them.
- Changes apply right away. As soon as you add a required field, every form in WRMD picks it up. There's no need to refresh, deploy, or restart anything.
Step 1: Open the Required Fields Page
- Log in to WRMD as an administrator.
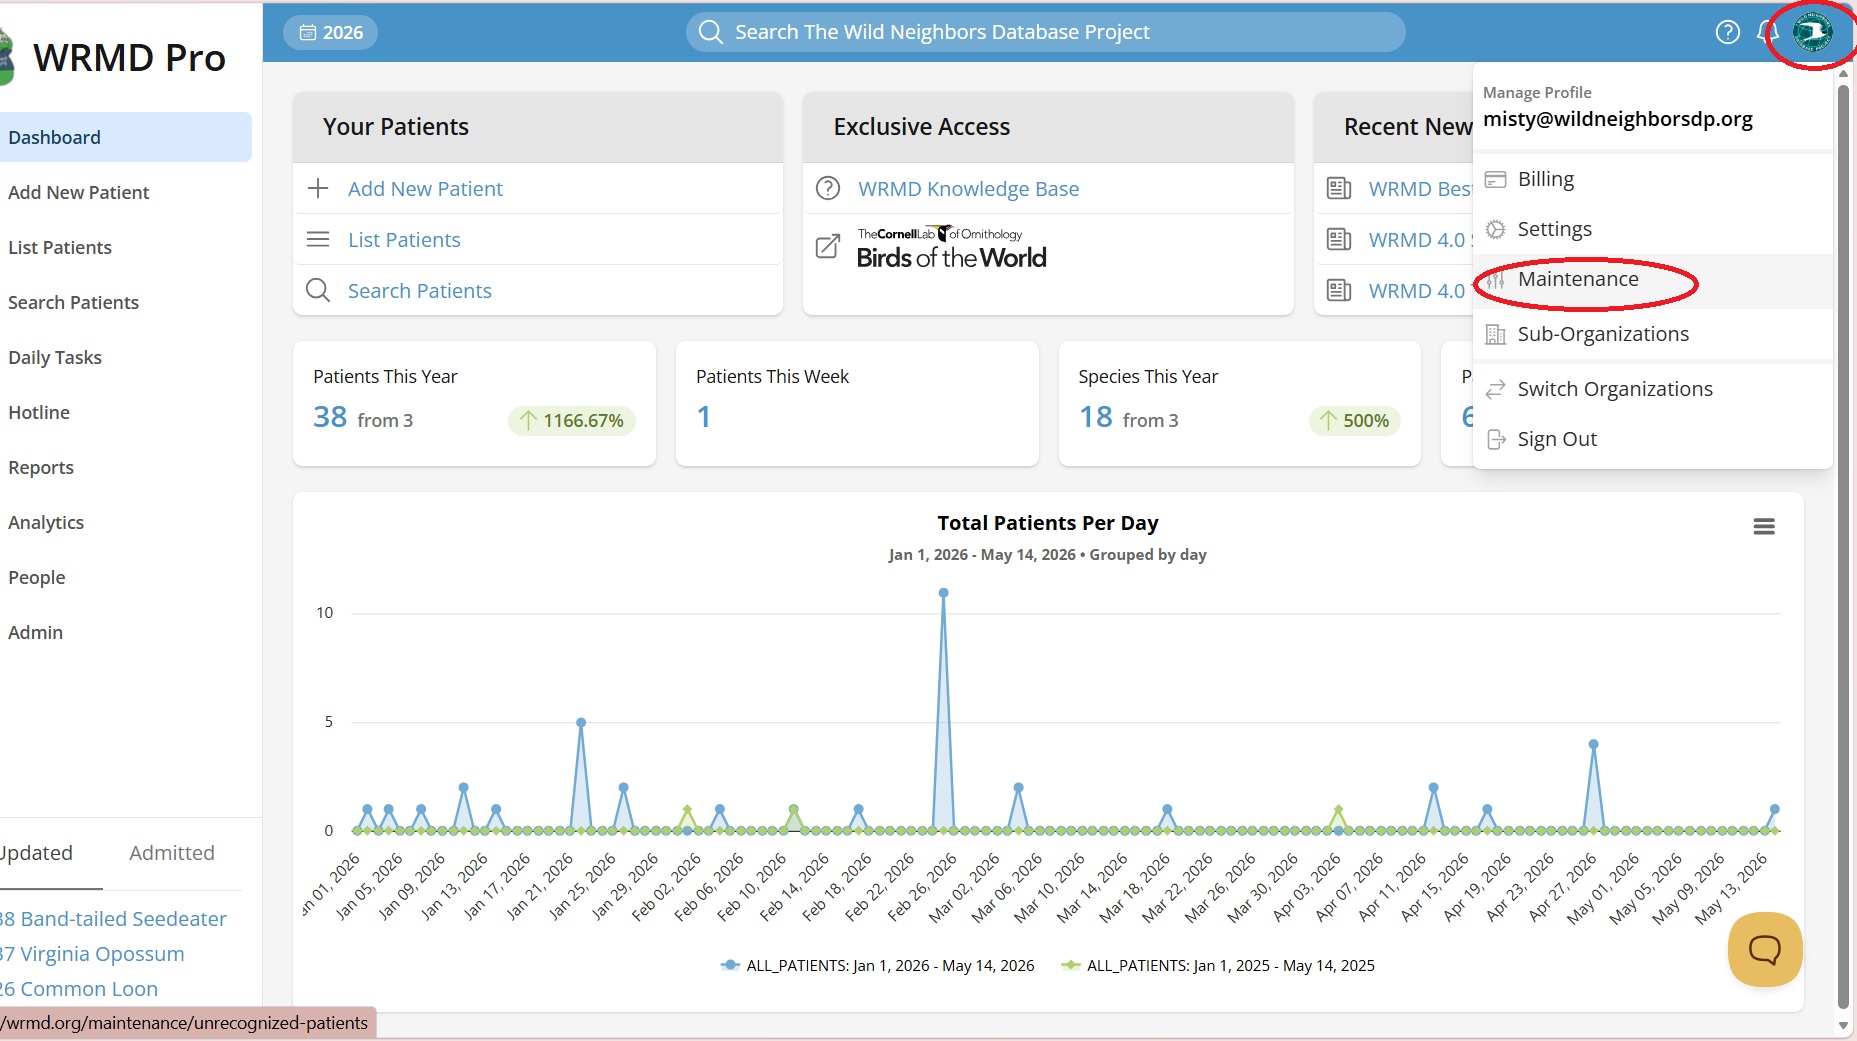
- Click Maintenance in the main menu.
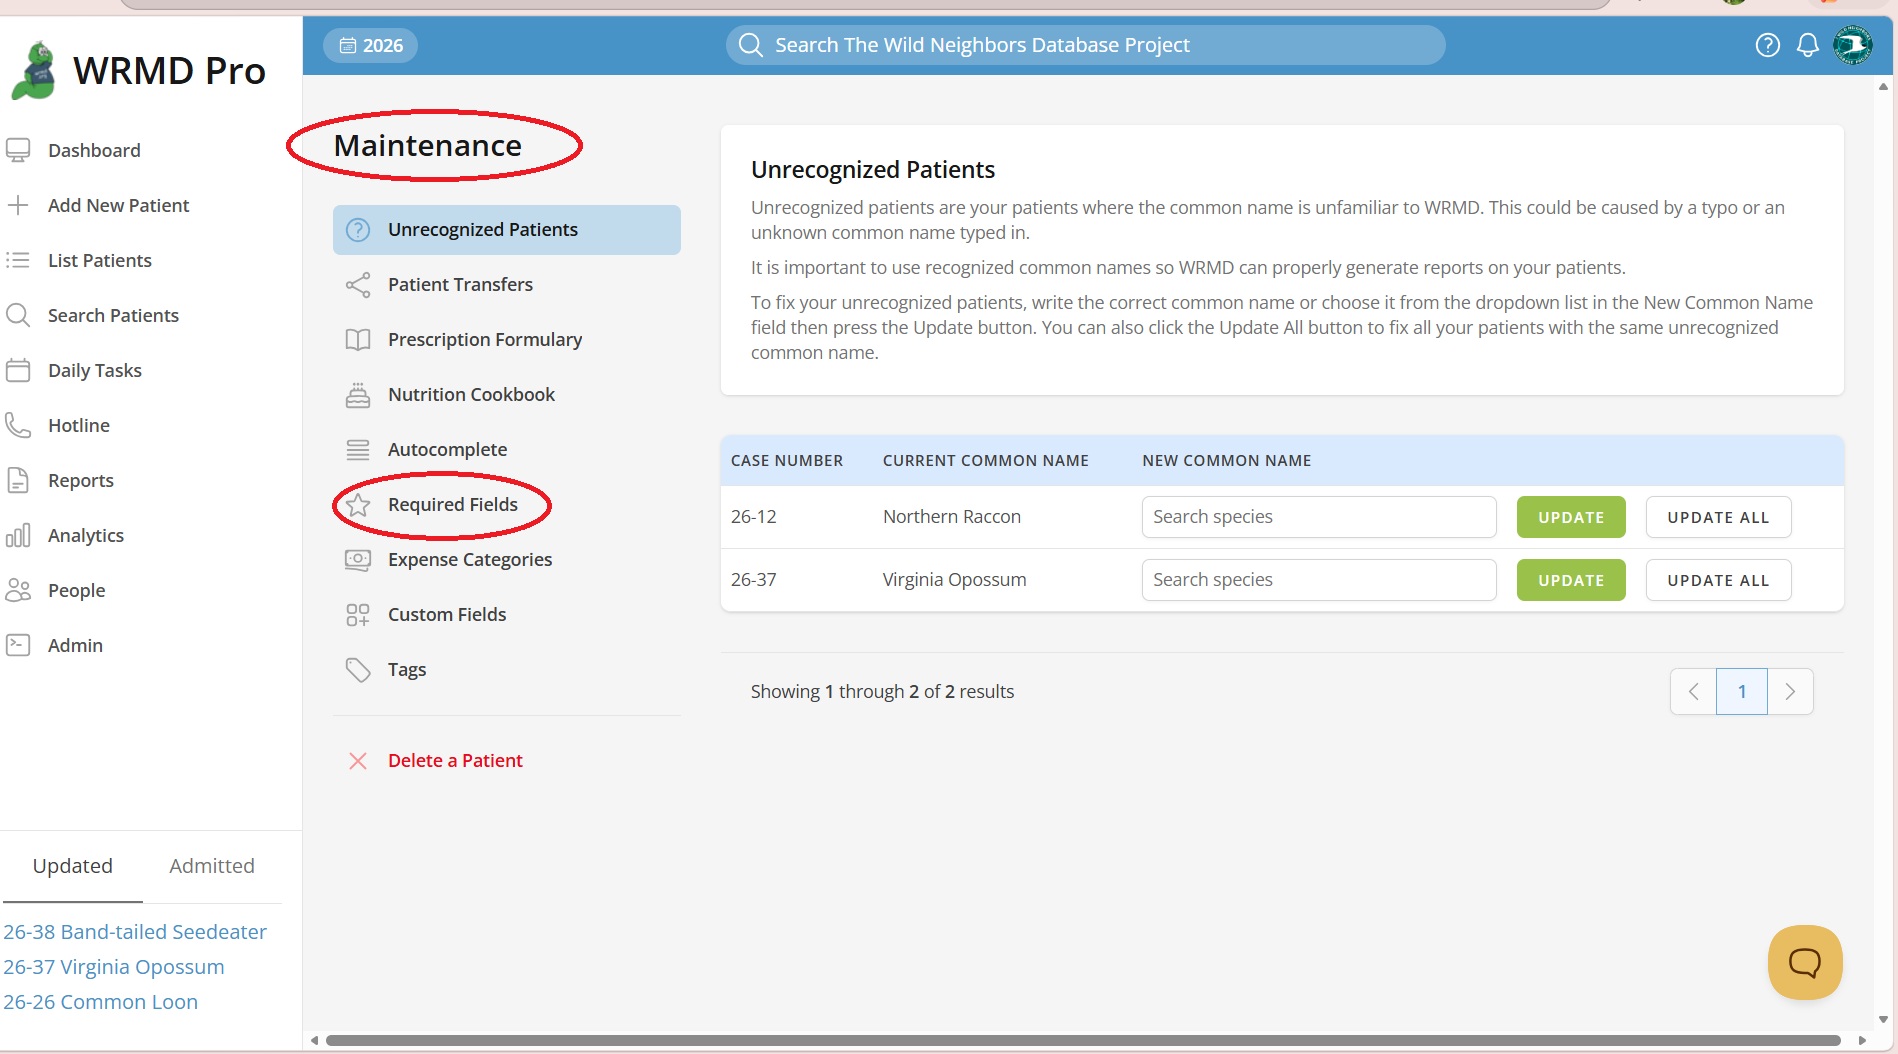
- In the Maintenance sidebar, click Required Fields.
You'll land on a page titled Required Fields. At the top, you'll see a short description:
> Some fields are required by WRMD and cannot be modified. Designate additional fields that should be required when saving patient data.
Below that is the list of fields your organization has already required. The first time you visit, the list will be empty and it will say:
> No required fields have been designated yet.
Step 2: Add a Required Field
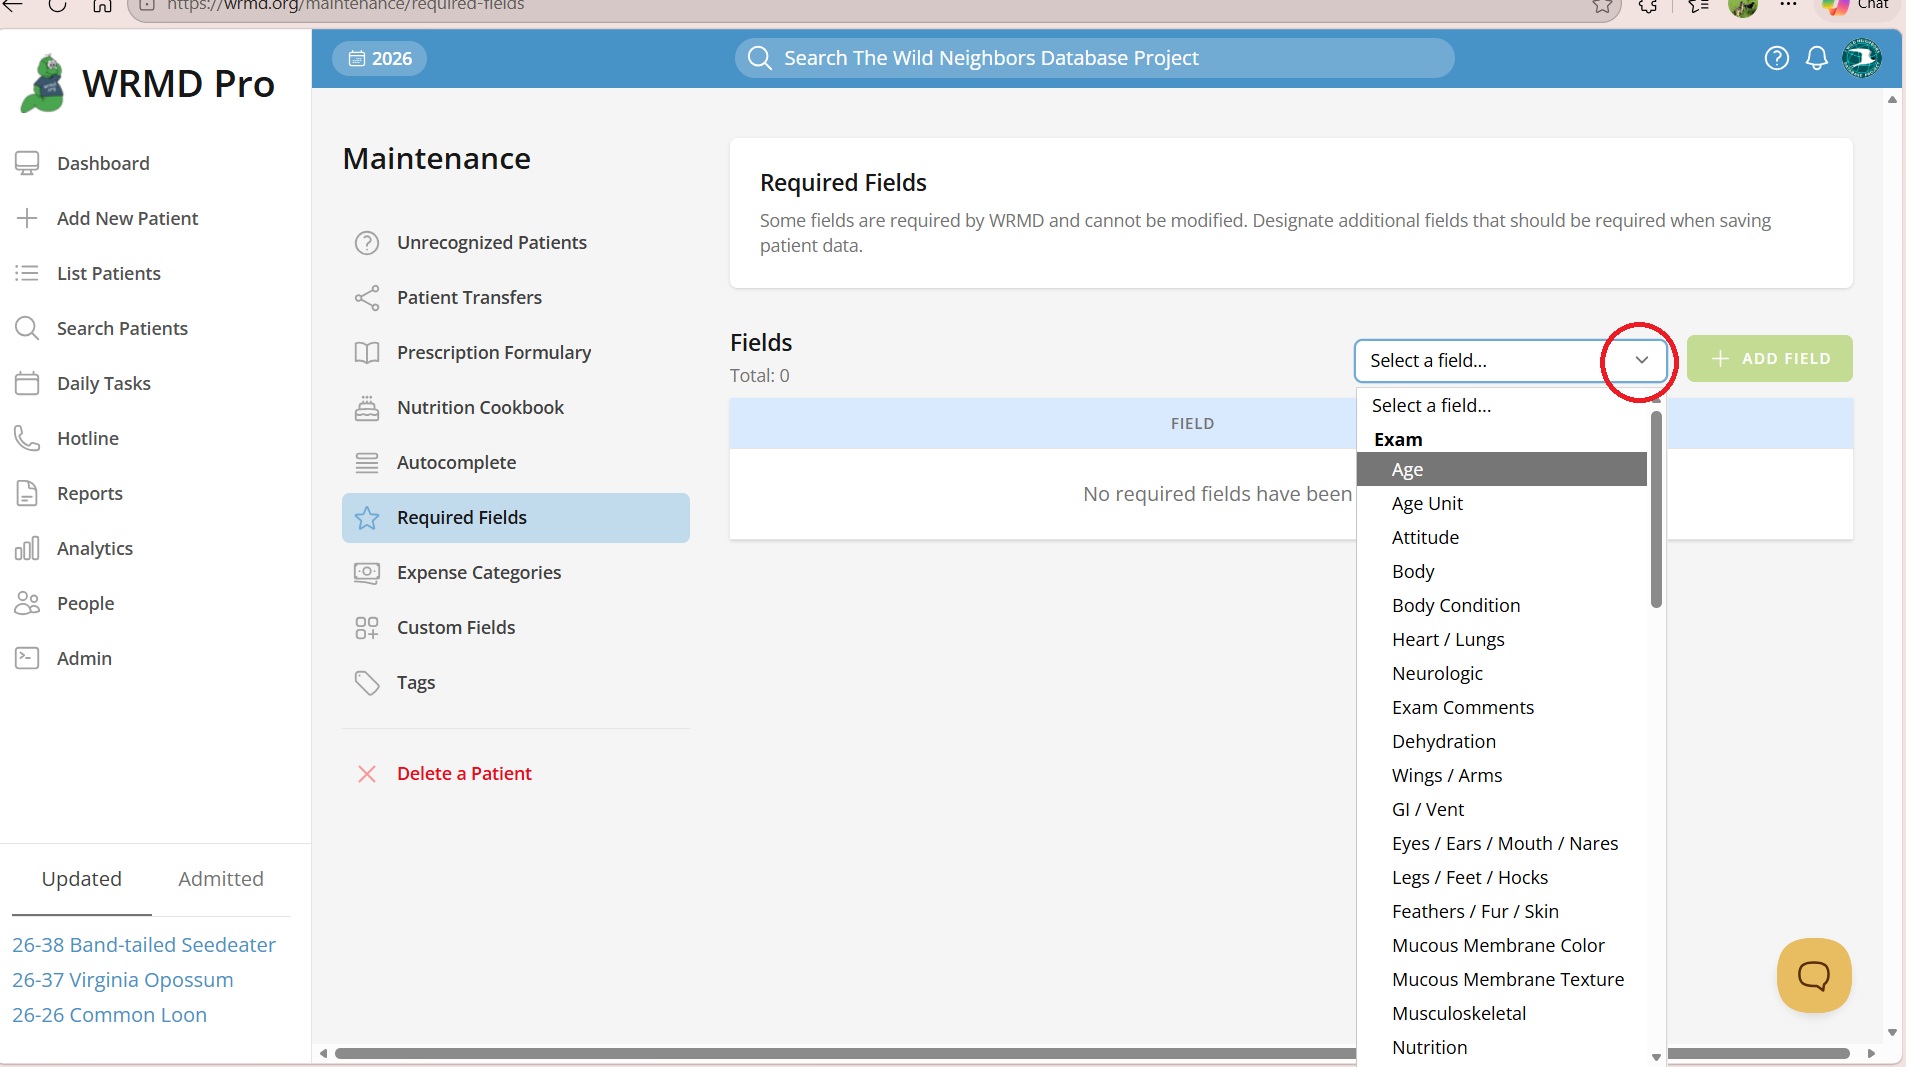
On the right side of the page, you'll see a dropdown menu and an Add Field button.
- Click the dropdown labeled Select a field...
- Browse the list. Fields are grouped by where they appear in WRMD — for example:
- Patient fields (like County Found, Postal Code Found, Transported By)
- Exam fields (like Date Examined, Examiner, Body Condition)
- Care Log fields (like Weight, Temperature)
- Disposition fields (like Outcome, Release Date)
- Custom fields you've defined for your organization
- Pick the field you'd like to require.
- Click the blue Add Field button.
The page refreshes and your new field appears in the table below, grouped under its category. The total count near the top of the page goes up by one.
That's it — that field is now required for everyone on your team.
> Tip: You can only require fields that make sense to require. Internal system fields (like database IDs) aren't shown in the dropdown.
Step 3: Remove a Required Field
Changed your mind? No problem.
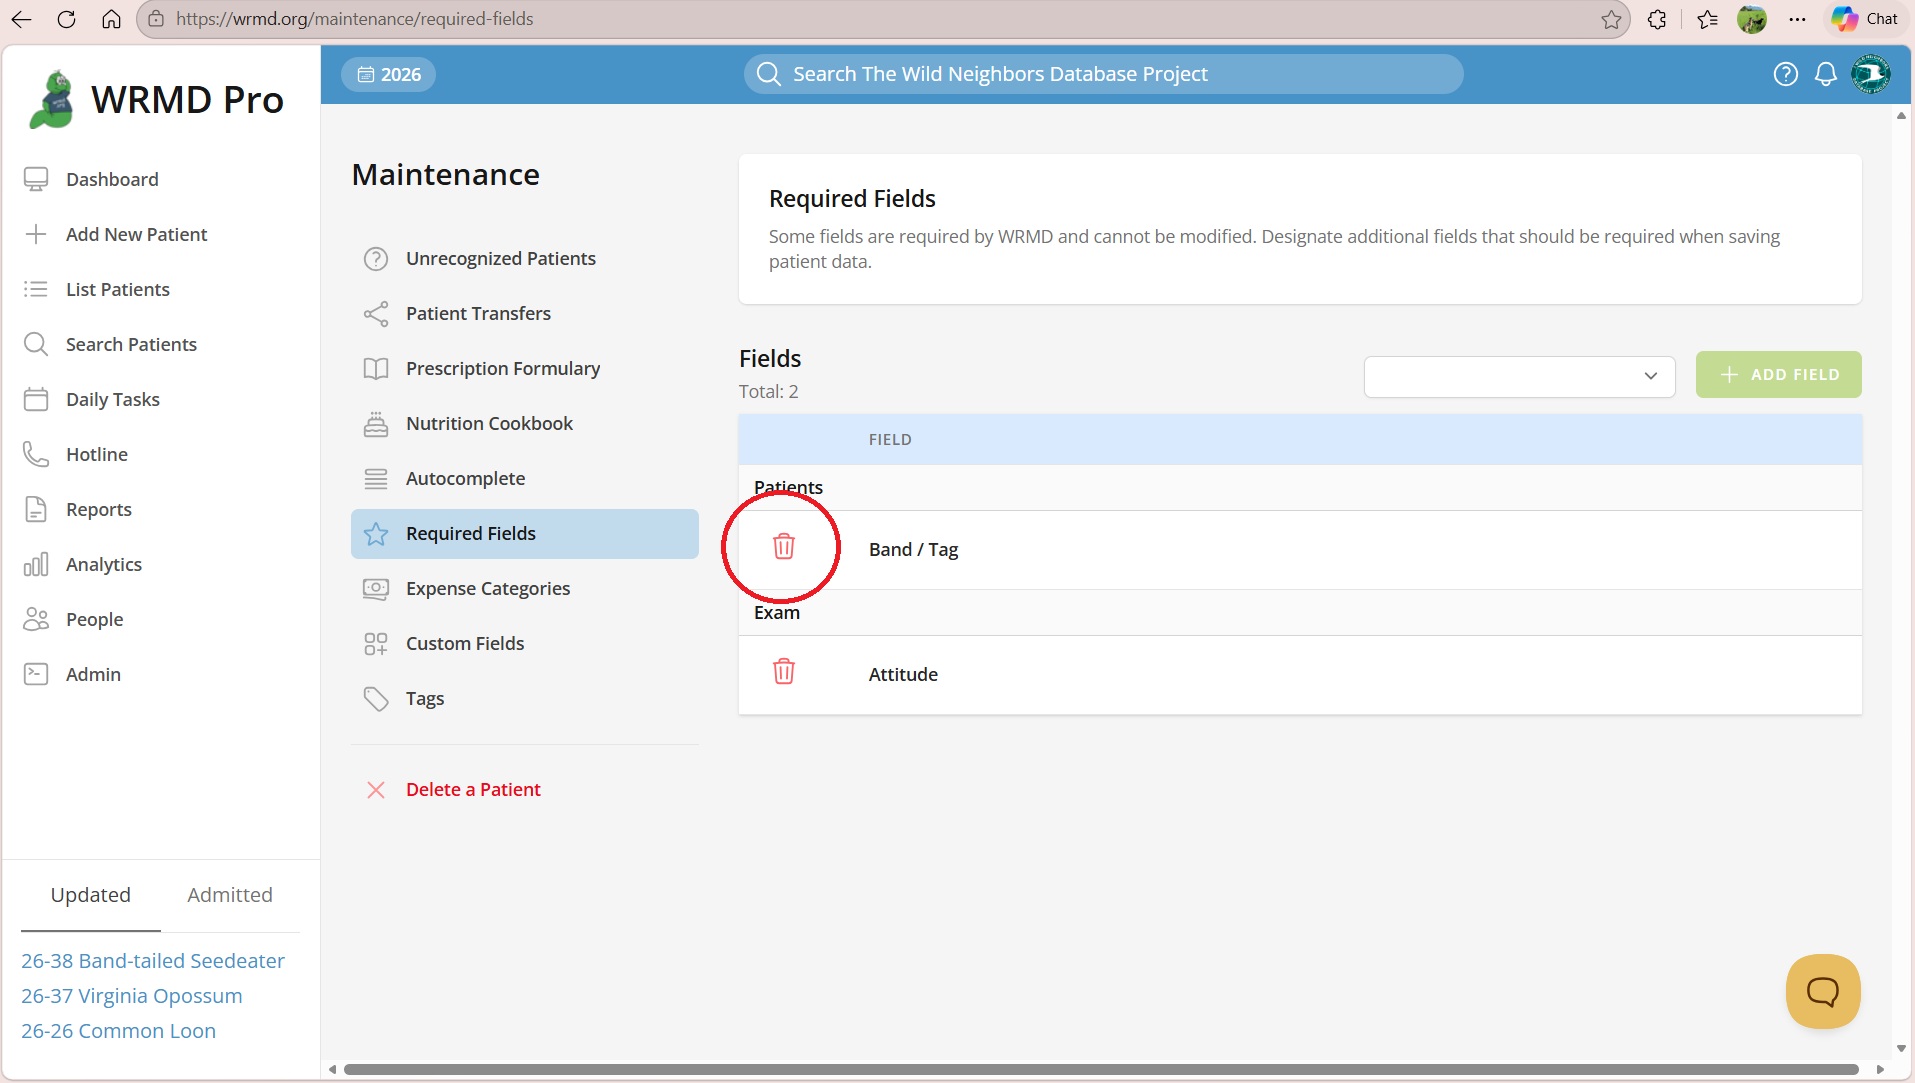
- Find the field in the table.
- Click the red trash can icon to the left of the field name.
- Confirm the prompt: "Are you sure you want to remove this required field designation?"
The field becomes optional again. Existing records aren't affected — the change only applies to forms going forward.
What Your Team Sees
Once you've added a required field, every member of your organization will notice two changes when working with records:
A red star next to the field
On any form containing that field, a small red star appears next to its label. If a team member hovers over the star, a tool tip explains:
> Required by your organization.
This makes it easy to tell the difference between WRMD's built-in required fields and the ones your organization has chosen.
A friendly error if they try to skip it
If someone tries to save a record without filling in a required field, WRMD displays a red error message at the top of the form listing the missing field(s). The form won't save until those fields are completed.
Tips for Getting It Right
- Start small. It's tempting to require everything, but too many required fields can slow your team down and create friction. Pick the handful of fields that genuinely matter for reporting, grants, or compliance.
- Talk to your team first. If you require a field that's hard to fill in (for example, an exact rescue location for animals brought in anonymously), volunteers and staff may get stuck. Ask the people doing the data entry what's realistic.
- Revisit periodically. Requirements change. Once a quarter, take a look at your list and prune anything that's no longer useful.
- Use custom fields for organization-specific needs. If WRMD doesn't have a field for the data you collect, set up a custom field first, then mark it required.
Frequently Asked Questions
Can I require a field for some species but not others? No. A required field applies to every record of that type. If you only need a field for specific situations, leave it optional and train your team on when to use it.
What happens to records that were saved before I marked a field required? Nothing. Existing records stay exactly as they are. The requirement only applies when someone saves a record from now on.
Can I require WRMD's built-in optional fields? Yes. Any field shown in the dropdown can be required, including most standard WRMD fields.
Why isn't a required outcome field enforced for every outcome? The Outcome section only shows some fields for certain outcomes, and WRMD only enforces a required field when the form shows it. Release Type is only required for a Released outcome, Transfer Type only for a Transferred outcome, and Disposition Transported By only for a Released or Transferred outcome. Reason for Disposition is not required for a Dead on arrival outcome, except for organizations in Colorado. While the outcome is Pending, none of the outcome fields are required.
Will I lose my settings if I cancel my Pro plan? Your required field designations stay in the system, but they stop being enforced when your plan changes. If you re-subscribe to Pro, they'll resume working.
Wrapping Up
Required Fields is a small feature with a big impact. With a few clicks, you can make sure your team consistently captures the information that matters most to your organization — without writing a single line of code or sending another "please don't forget to fill in X" email.