Recording Waterproofing Assessments
This tutorial explains how to document waterproofing assessments for oiled wildlife patients. After washing, animals must regain their natural waterproofing before release. The Waterproofing Assessment page tracks each evaluation of the animal's progress toward full waterproofing.
Accessing the Waterproofing Assessment Page
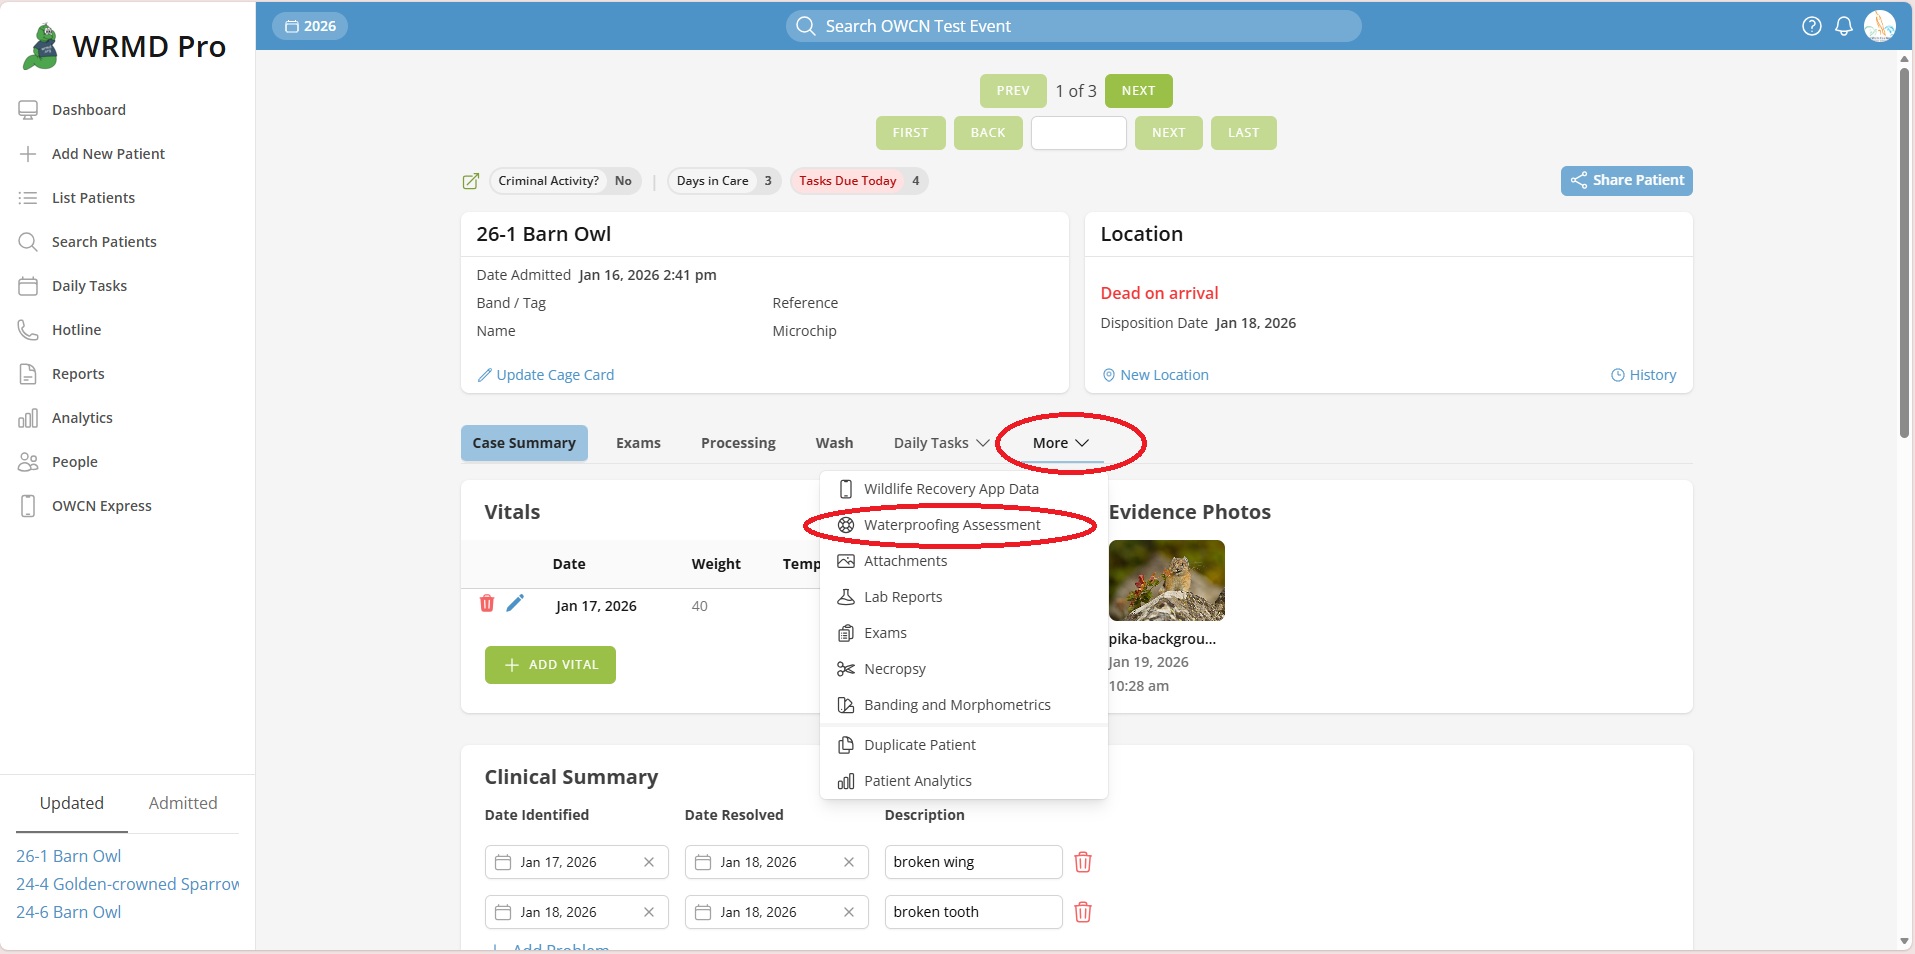
- Navigate to an oiled patient's record.
- Click the More menu in the patient navigation.
- Select Waterproofing Assessment from the dropdown.
Adding a Waterproofing Assessment
- Click the Add New Waterproofing Assessment button.
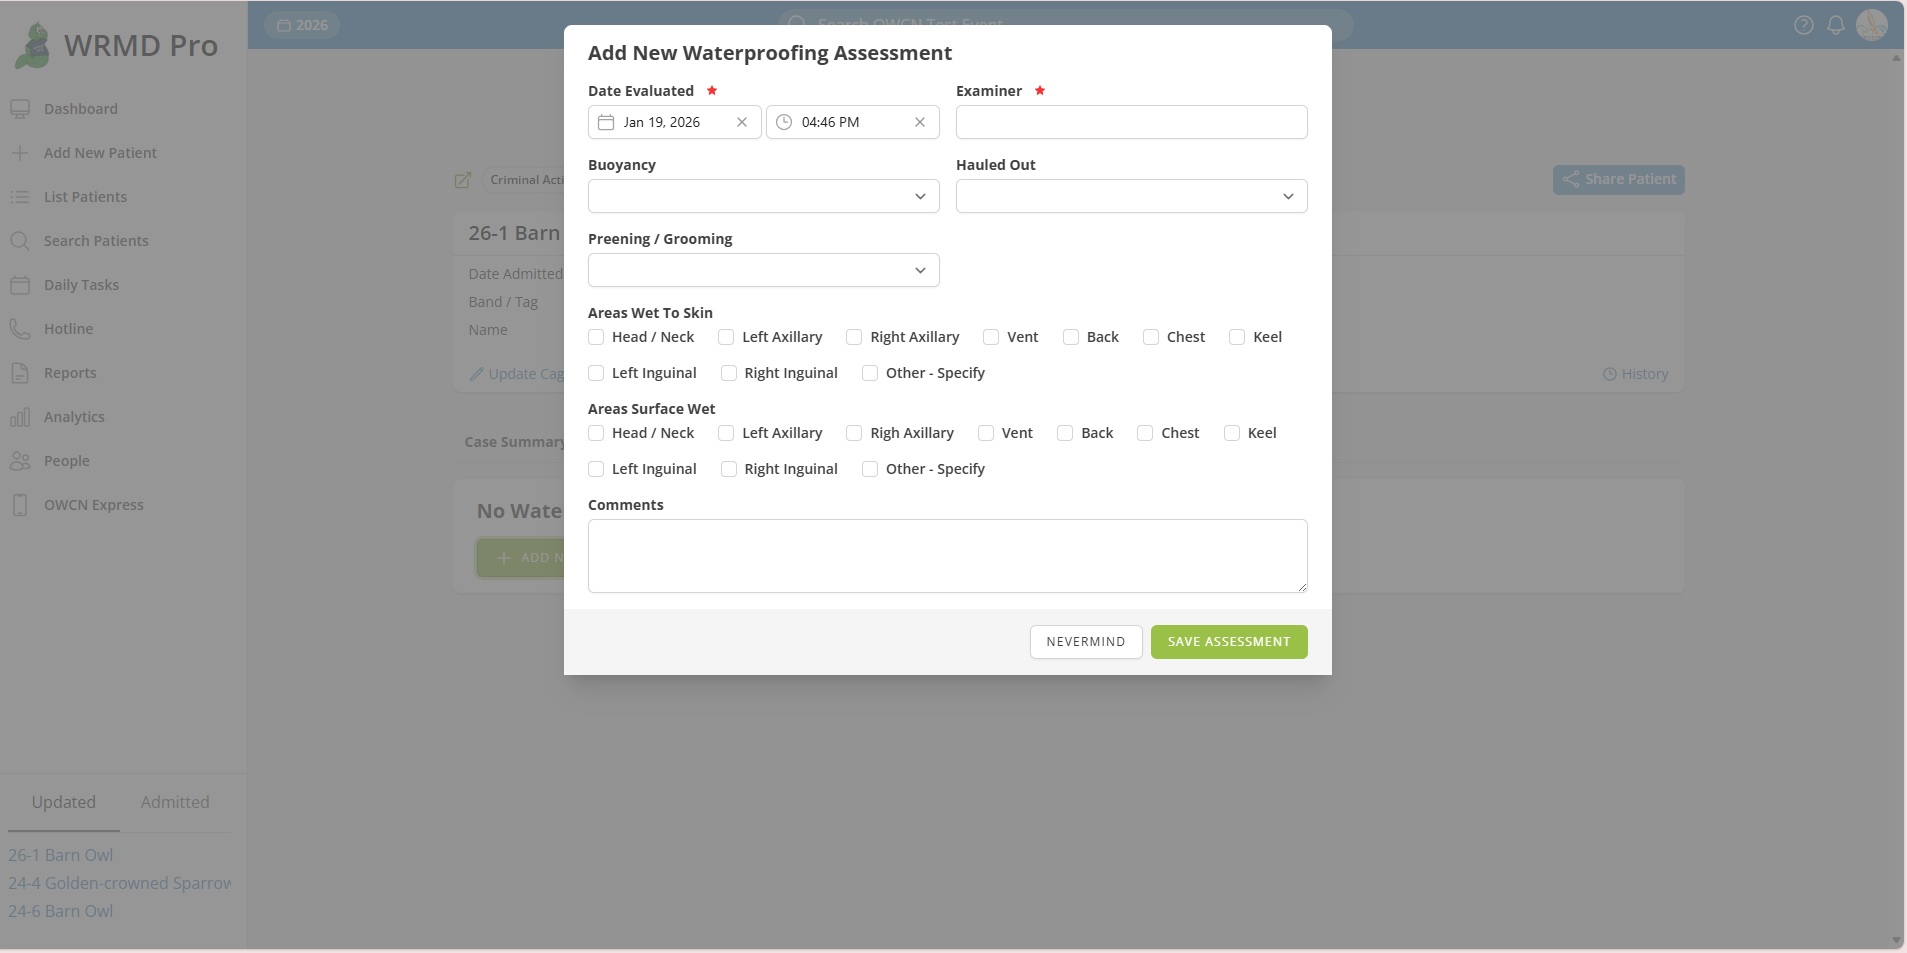
- A modal window will open with the assessment form.
- Enter Date, Time, and Examiner
- Enter the Date Evaluated when the assessment was performed.
- Enter the time of the evaluation.
- Enter the Examiner name (the person conducting the assessment).
Note: The date and time will default to the current date and time.
-
Assess Buoyancy
- Select the Buoyancy status from the dropdown menu. This indicates how well the animal is floating in water.
Tip: Proper buoyancy is a key indicator of feather condition in birds. Animals with compromised waterproofing may sit low in the water or have difficulty staying afloat.
- Select the Hauled Out status from the dropdown menu.
- This indicates whether the animal is voluntarily leaving the water to rest on a dry surface.
- Select the Preening / Grooming status from the dropdown menu.
- This documents the animal's self-maintenance behavior, which is essential for restoring waterproofing.
Tip: Active preening is a positive sign that the animal is working to realign feathers and distribute natural oils.
- Check all body areas where water is penetrating through to the skin.
- Select multiple areas if applicable.
Common areas to assess include various body regions (head, neck, back, breast, belly, wings, tail, etc.).
- Check all body areas where water is present on the surface but not penetrating to the skin.
- Select multiple areas if applicable.
Tip: As waterproofing improves, you should see areas transition from "wet to skin" to "surface wet" and eventually to fully waterproof.
- Enter any additional observations about the animal's waterproofing status in the Comments field.
- Click Save Assessment to create the record.
Viewing Waterproofing Assessments
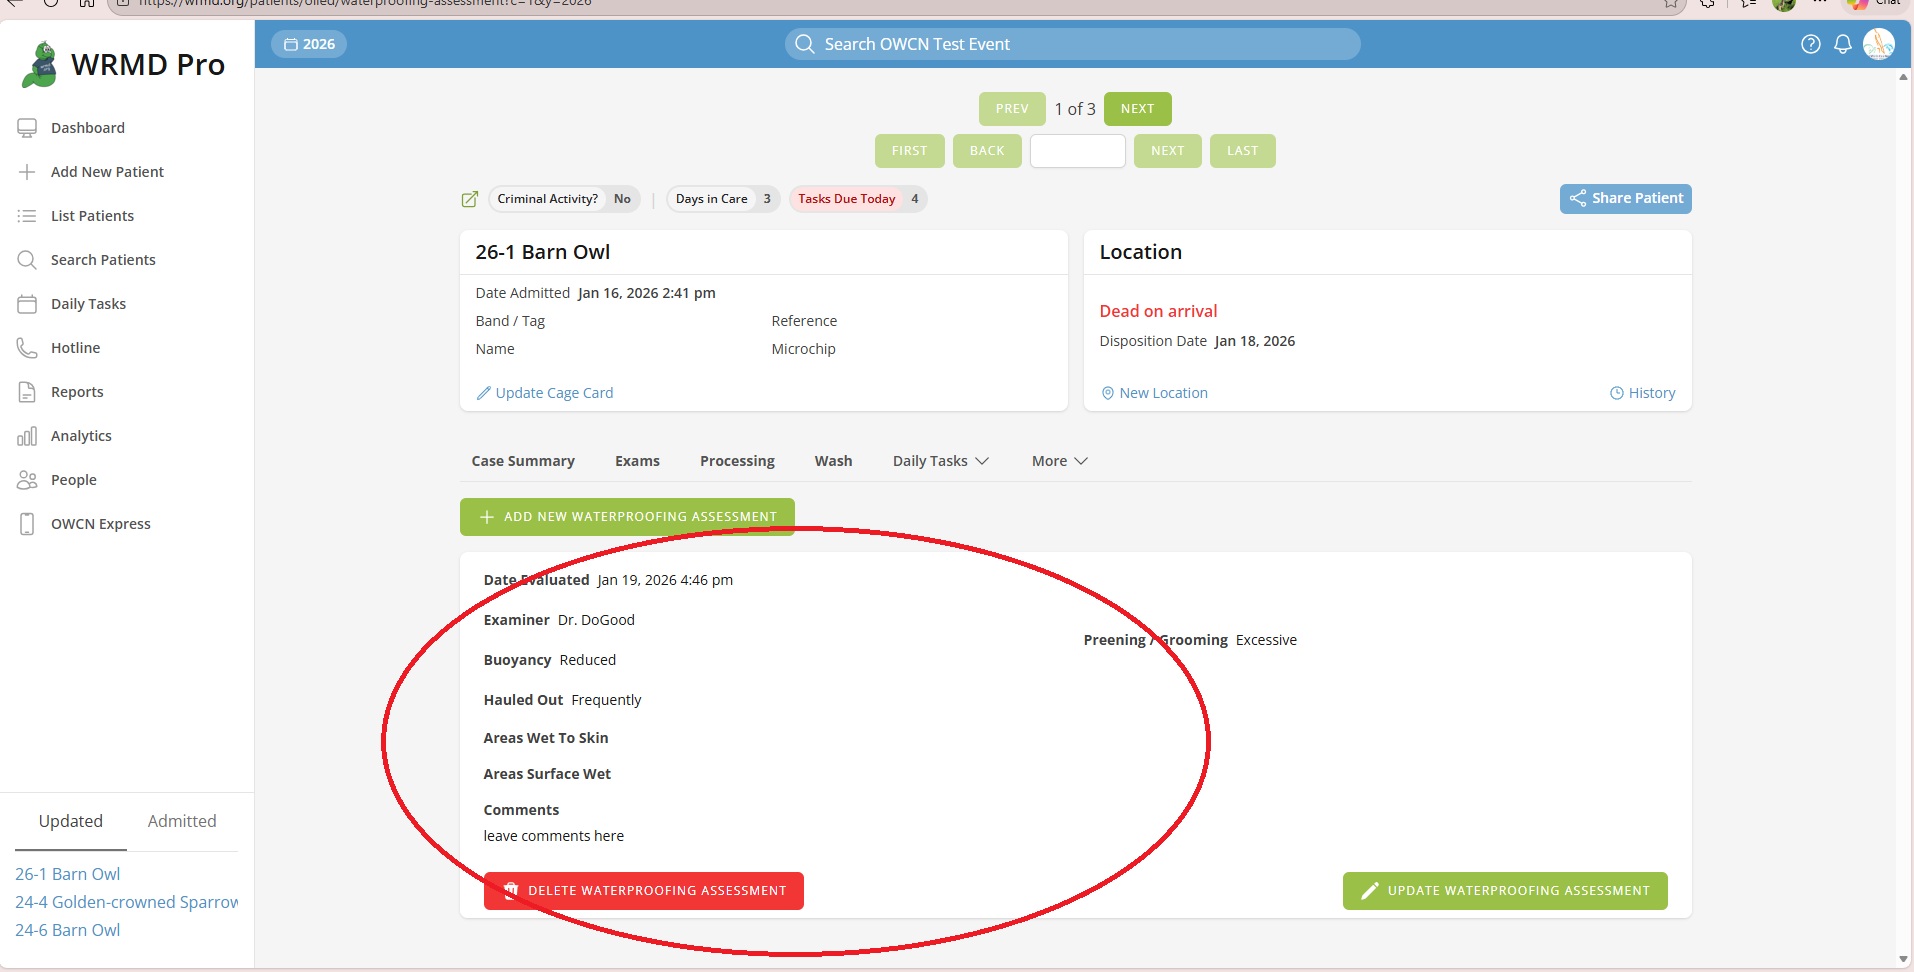
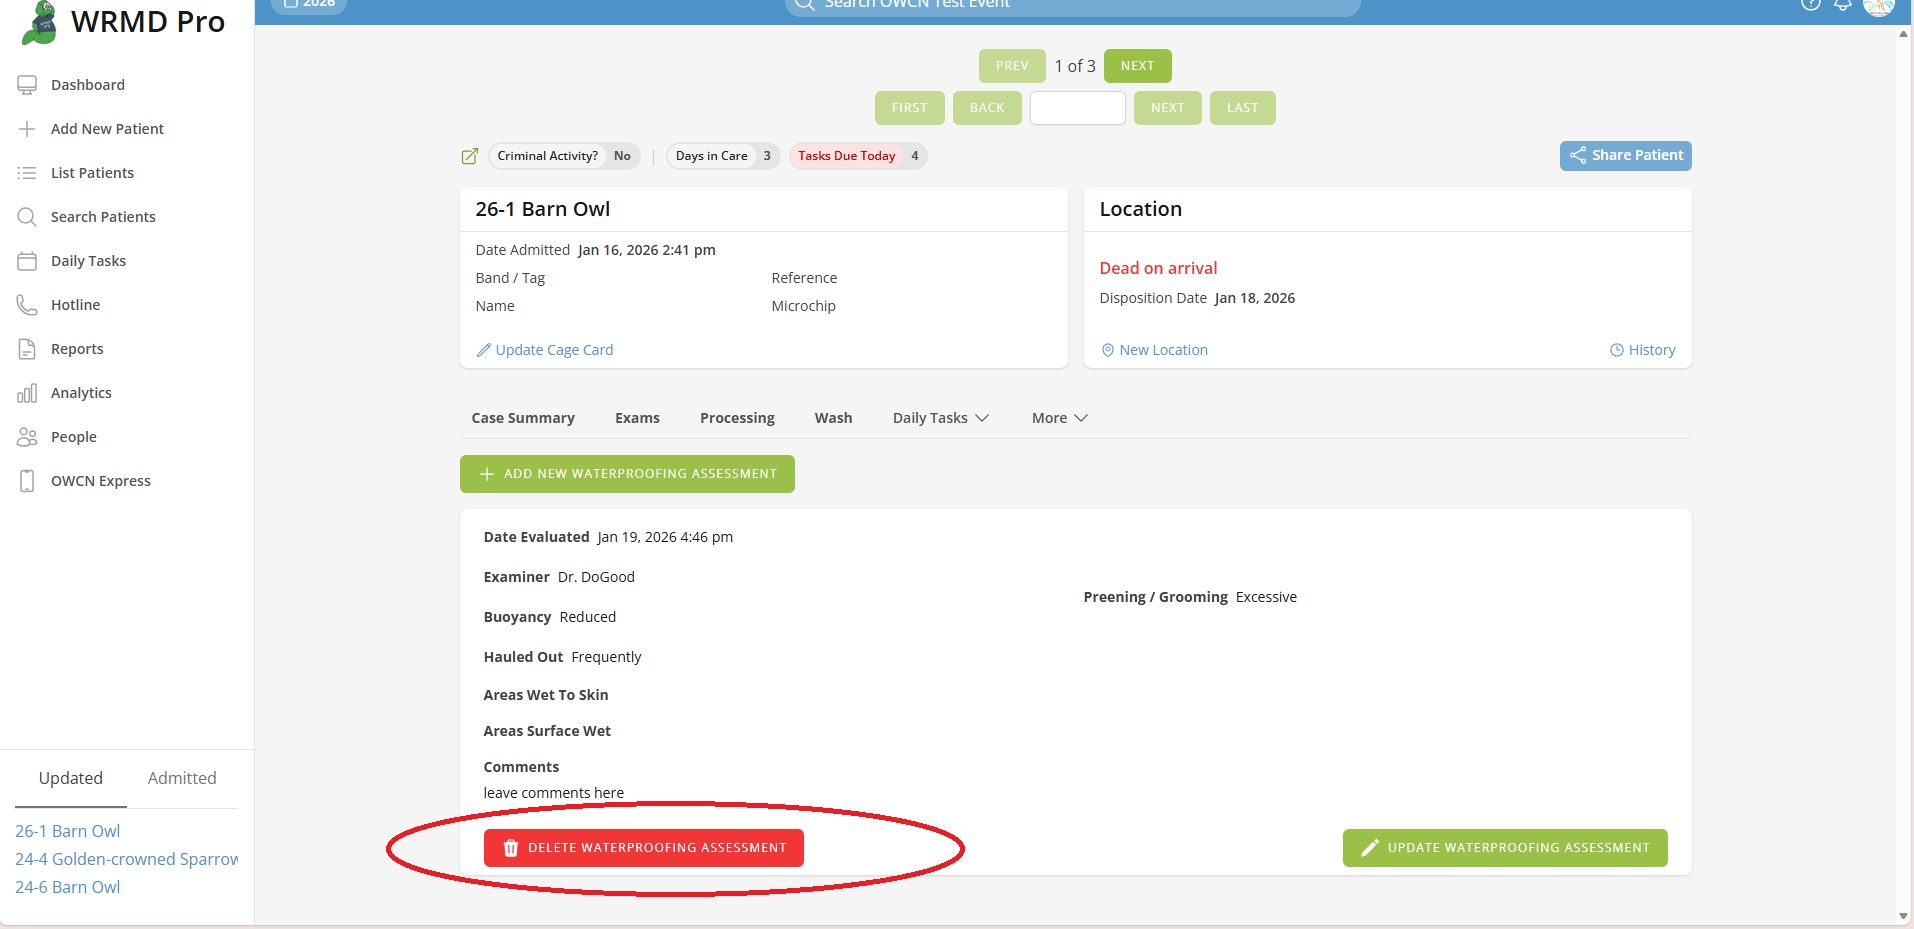
After saving, assessment records appear as cards on the Waterproofing Assessment page. Each card displays:
- Date and time evaluated
- Examiner name
- Buoyancy status
- Hauled out status
- Preening/grooming status
- Areas wet to skin
- Areas surface wet
- Comments
Editing a Waterproofing Assessment
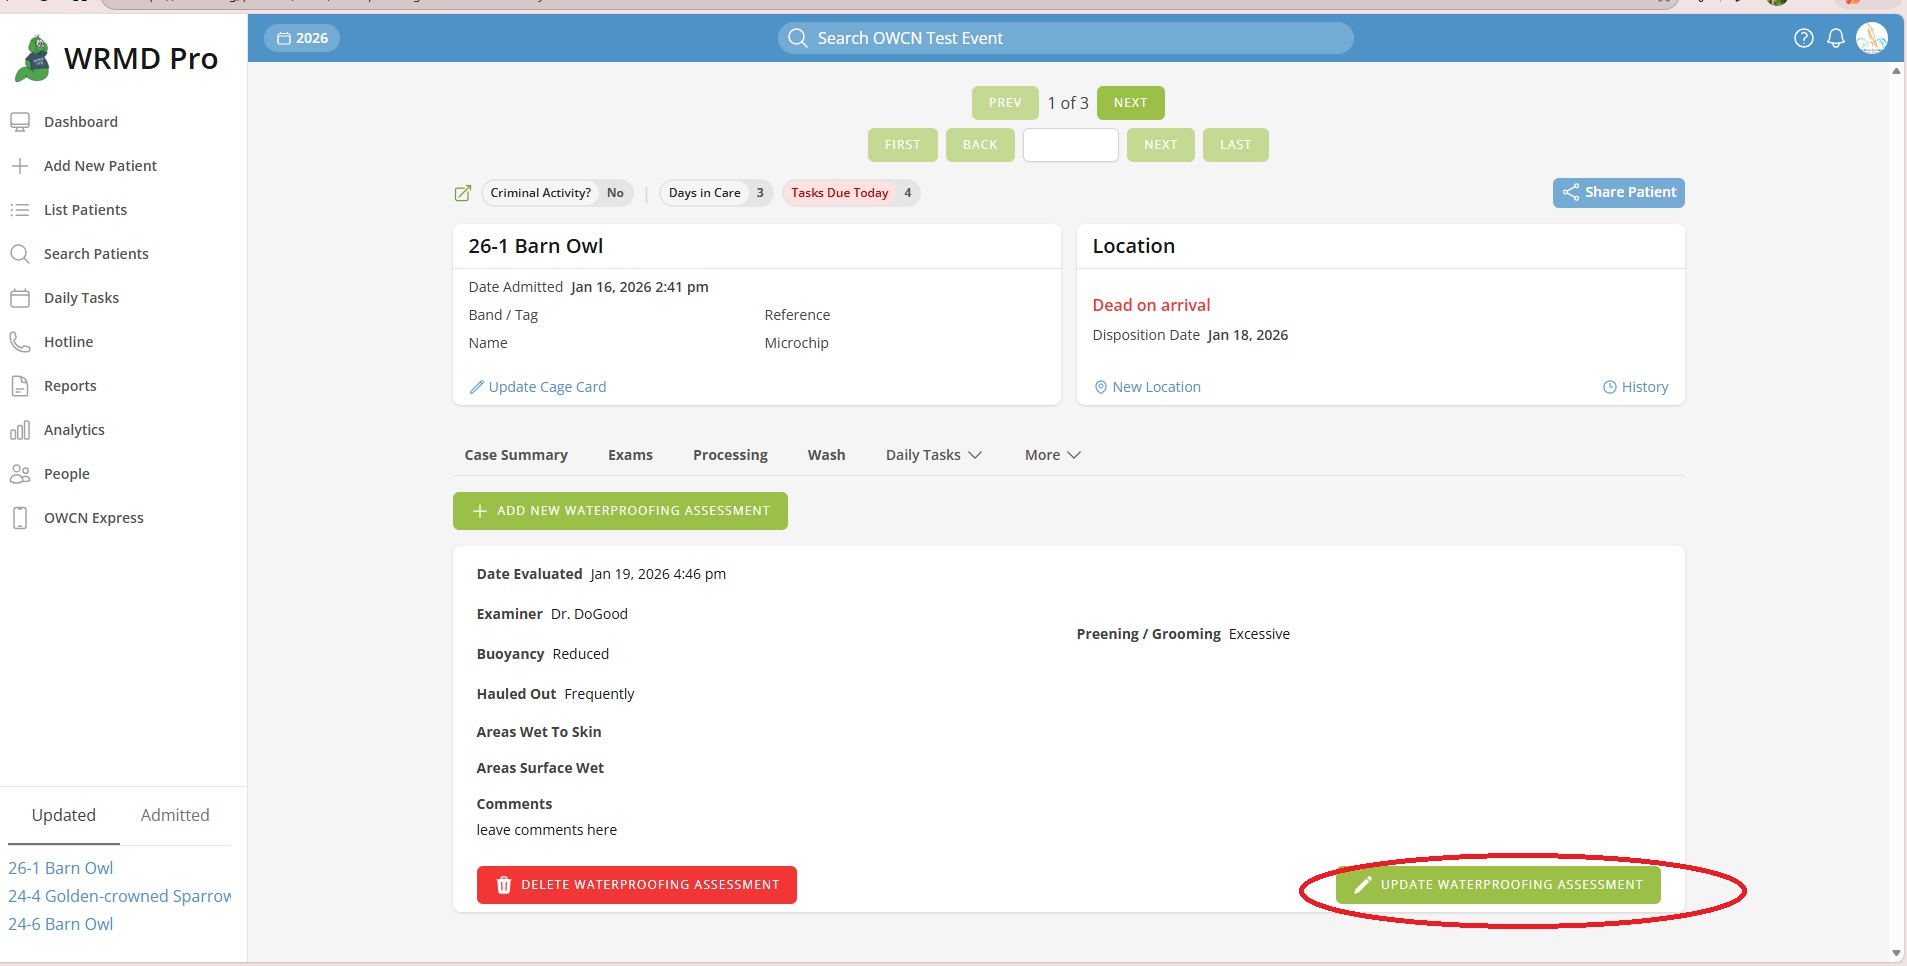
- Locate the assessment card you want to edit.
- Click the Update Waterproofing Assessment button at the bottom of the card.
- Modify the information in the modal window.
- Click Save Assessment to save your changes.
Deleting a Waterproofing Assessment
- Locate the assessment card you want to delete.
- Click the Delete Waterproofing Assessment button (red button) at the bottom of the card.
- Confirm the deletion in the confirmation dialog.
Warning: Deleting an assessment record is permanent and cannot be undone
Tracking Progress Over Time
Multiple assessments should be recorded throughout the conditioning period to track the animal's progress toward full waterproofing. Each assessment provides a snapshot of the animal's condition, allowing you to:
- Monitor improvement in buoyancy
- Track reduction in areas wet to skin
- Document increasing preening activity
- Determine when the animal is ready for release