Creating a New Oil Spill Event
This tutorial explains how to create a new oil spill event by creating a sub-organization from a master oil spill organization. Sub-organizations inherit settings and extensions from the master organization, making it easy to set up new response teams during an oil spill event.
Prerequisites
- You must be logged into a master oil spill organization
- You must have permission to view and manage sub-organizations
Accessing Sub-Organizations
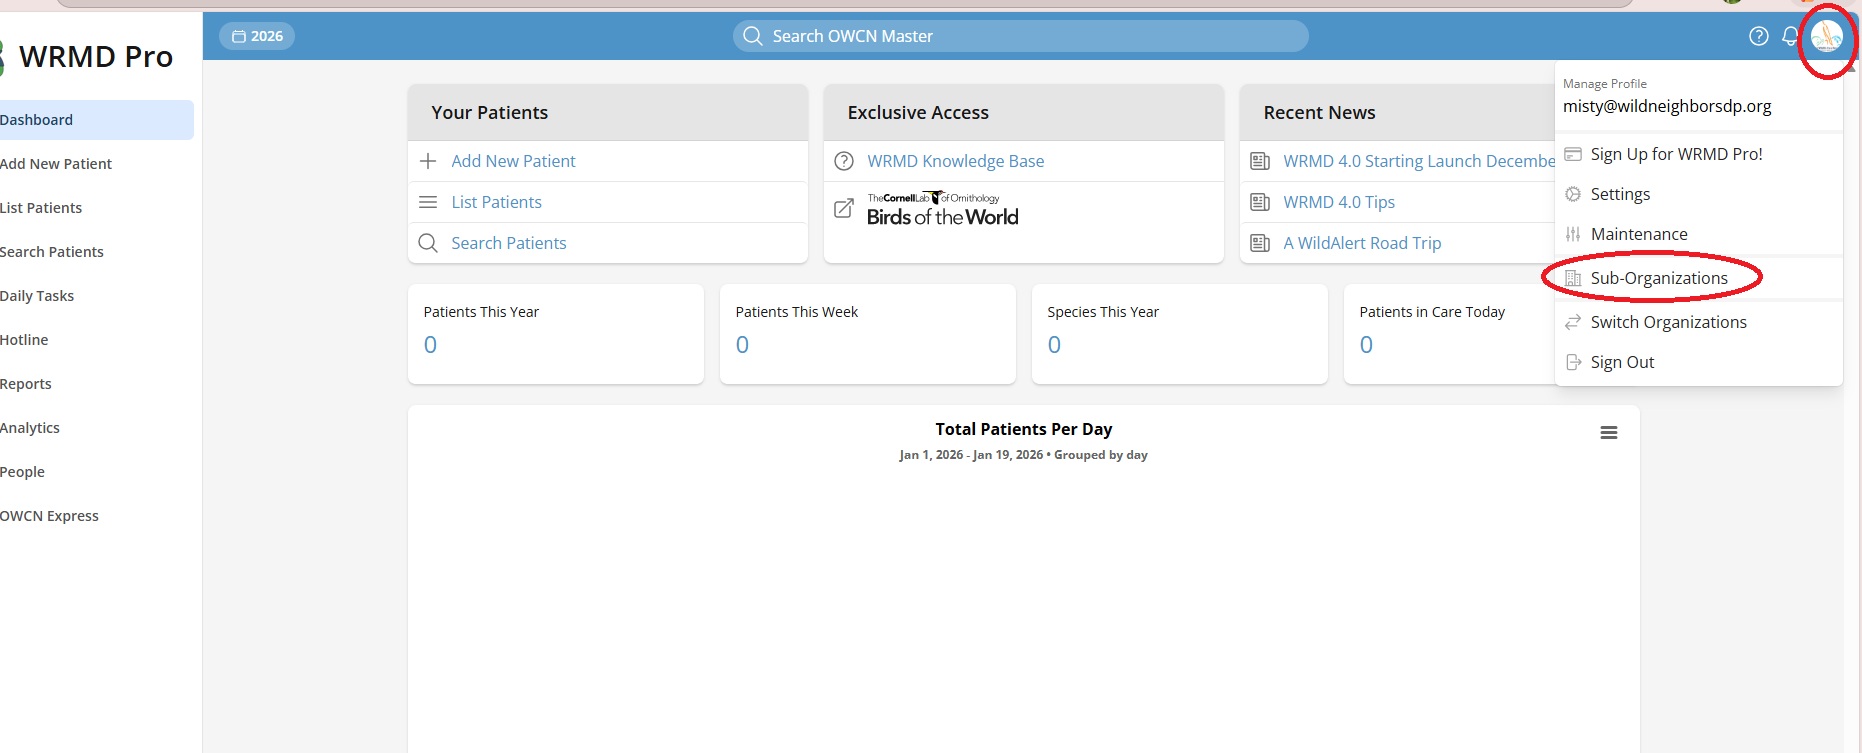
- Click your profile icon in the top right corner of the screen.
- Select Sub-Organizations from the dropdown menu.
Note: The Sub-Organizations option only appears if your organization is configured as a master organization and you have the appropriate permissions.
Viewing Existing Sub-Organizations
The Sub-Organizations page displays a table of all sub-organizations with:
- Organization name
- Contact name
- Address/location
- Date created
- Status (Active, Discontinued, or Un-used)
Creating a New Sub-Organization
Step 1: Start the Creation Process
- Click the New Sub-Organization button in the top right corner of the Sub-Organizations page.
Step 2: Pre-fill Organization Details (Optional)
To save time, you can copy details from the master organization:
- Click the Copy Details from Master Organization button.
- This will automatically fill in the address, contact information, and other details from the master organization.
- You can then modify any fields as needed for the new sub-organization.
Step 3: Enter Organization Details
Fill in the Sub-Organization Details section:
- Status - Select the organization's status:
- Active - The organization is currently operational
- Discontinued - The organization is no longer active
- Un-used - The organization has not yet been used
- Organization - Enter the name of the new organization (required).
- Contact Name - Enter the primary contact person's name (required).
- Contact Email - Enter the contact email address (required).
- Phone Number - Enter the contact phone number (required).
- Address - Enter the street address (required).
- Country / Region - Select the country (required).
- State - Select the state or province (required).
- City - Enter the city name (required).
- ZIP / Postal - Enter the postal code (optional).
- Federal Permit # - Enter the federal permit number if applicable (optional).
- State Permit # - Enter the state permit number if applicable (optional).
- Notes - Enter any additional notes about the organization (optional).
Step 4: Configure Setup Options
The Sub-Organization Setup section allows you to inherit configurations from the master organization:
- Copy settings - Toggle ON to copy settings from the master organization into the sub-organization. This includes preferences and configurations.
- Copy activated extensions - Toggle ON to copy all activated extensions (such as Oil Spill, Lab Reports, Necropsy, etc.) from the master organization. This ensures the sub-organization has the same features enabled.
- Copy custom fields - Toggle ON to copy custom field configurations from the master organization. This maintains data consistency across organizations.
- Add current user - Toggle ON to automatically add yourself as a user in the new sub-organization. This allows you to access and manage the sub-organization immediately after creation.
Tip: For oil spill response organizations, it's recommended to keep all these options enabled to ensure consistent configuration across all response teams.
Step 5: Add Additional Users
The Add These Additional Users section displays a list of users from the master organization:
- Check the box next to each user you want to add to the new sub-organization.
- Selected users will be able to access and work within the new sub-organization.
Tip: You can add more users later through the sub-organization's user management settings.
Step 6: Create the Sub-Organization
- Review all the information you've entered.
- Click the Create New Sub-Organization button.
- The system will create the new organization and redirect you to the sub-organizations list.
After Creation
Once the sub-organization is created:
- It will appear in the Sub-Organizations list with its status
- Users added to the sub-organization can switch to it using the Switch Organizations option in their profile menu
- The sub-organization will have all the extensions and settings copied from the master organization (if those options were enabled)
- You can edit the sub-organization's details, manage users, and configure extensions by clicking on the organization name in the list
Managing Sub-Organizations
To manage an existing sub-organization:
- Navigate to the Sub-Organizations page.
- Click on the organization's name in the table.
- From here you can:
- Edit organization details
- Manage users
- Configure extensions
- Adjust settings