How to Set up a Surveillance Target
In this tutorial, you will learn how to set up a surveillance target. You may define surveillance targets to monitor for events involving specific wildlife species or taxa and specific clinical classifications (e.g., neurologic disease). When a target is saved, you can apply filters to explore data over a specified time period and configure how you want to be alerted of anomalous events.
Step 1
To define a new target, click on the Targets button along the top banner of the dashboard.

Step 2
Click on the Add Target button.
Step 3
On the page for Target Parameters, fill in the parameters for the surveillance target. Each parameter is a separate button you can click to open its configuration card. The available parameters are Taxonomic Group, Geographic Area, Circumstances of Admission, and Clinical Classifications.
Start with Taxonomic Group. A target searches by one of two things, chosen with the two tabs at the top of the card: Specific taxa or Biological groups. Switching tabs clears whatever you had chosen on the other tab, so a target only ever saves one or the other.
Specific taxa: type into the Search taxa box to find the taxa for your target. You can search by common name (e.g., Brown Pelican), by scientific name (e.g., Pelecanus occidentalis), or by a genus, family, or order name (e.g., Columbiformes) if you want your target to include multiple species within a taxonomic group. Each result shows its rank; click a result to add it to the target. You can add as many taxa as you like, and a case will count toward the target if it matches any of the taxa you include.
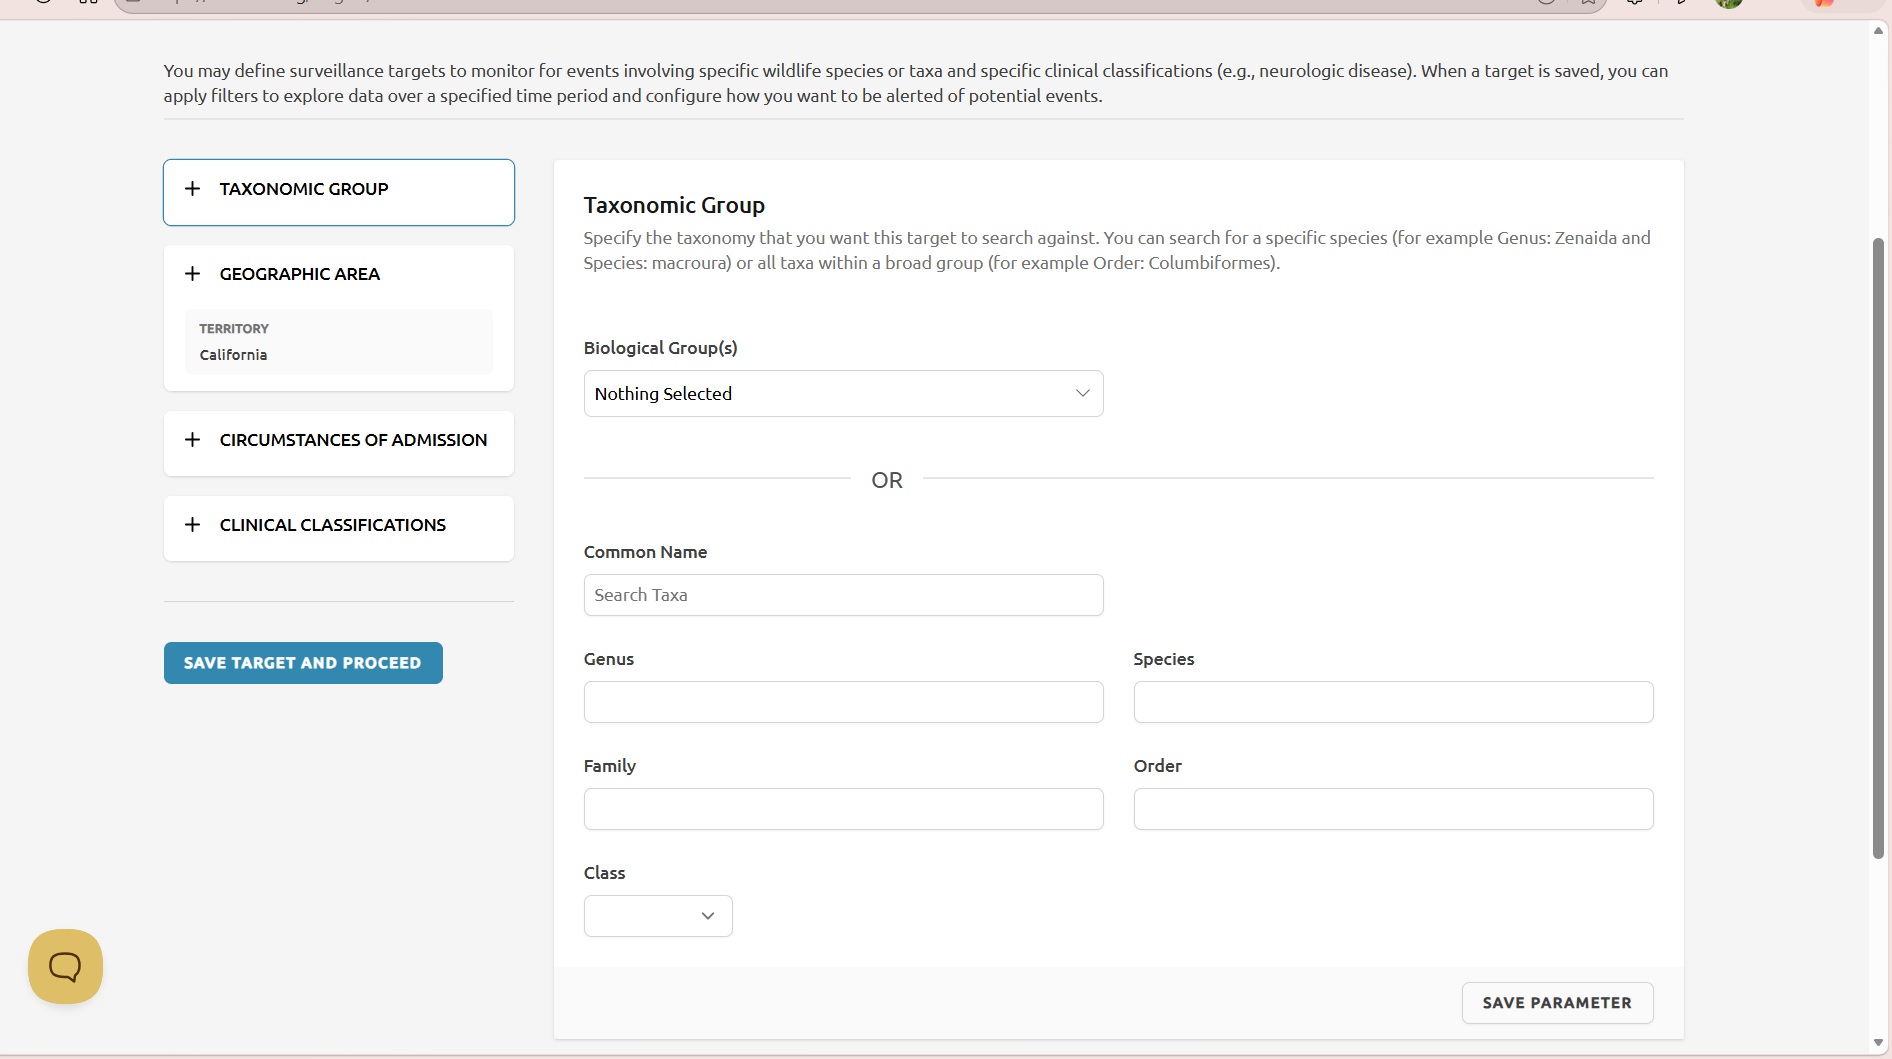
Above the search box, the Add what I pick to switch controls whether the next result you click is added to the Include list or the Exclude list. Excluded taxa are dropped from the target even when they match something you included. For example, include the family Accipitridae and exclude Buteo jamaicensis to monitor all hawks except Red-tailed Hawks. You must include at least one taxon before you can exclude anything, because an exclusion on its own has nothing to narrow. Each chosen taxon appears as a chip beneath the search box; use the arrow on a chip to move it between Include and Exclude, or the × to remove it.

Biological groups: alternatively, click the Biological groups tab and select one or more of the pre-populated biological groups (e.g., shorebirds, seabirds, waterfowl, raptors) if you want your target to include every species within a biological group. When you select more than one group, an Any / All toggle appears. Any counts cases whose taxon carries at least one of the selected groups, while All requires the taxon to carry every selected group (e.g., species that are both seabirds and shorebirds). You can also use Exclude Biological Group(s) to drop cases whose taxon carries a group you do not want.

Step 4
Click on the Save Parameter button at the bottom right of the screen once you have entered the taxonomic information. Your selections will also be saved automatically if you switch to a different parameter button.

Step 5
To specify a geographic area for your target, click on the Geographic Area parameter button.
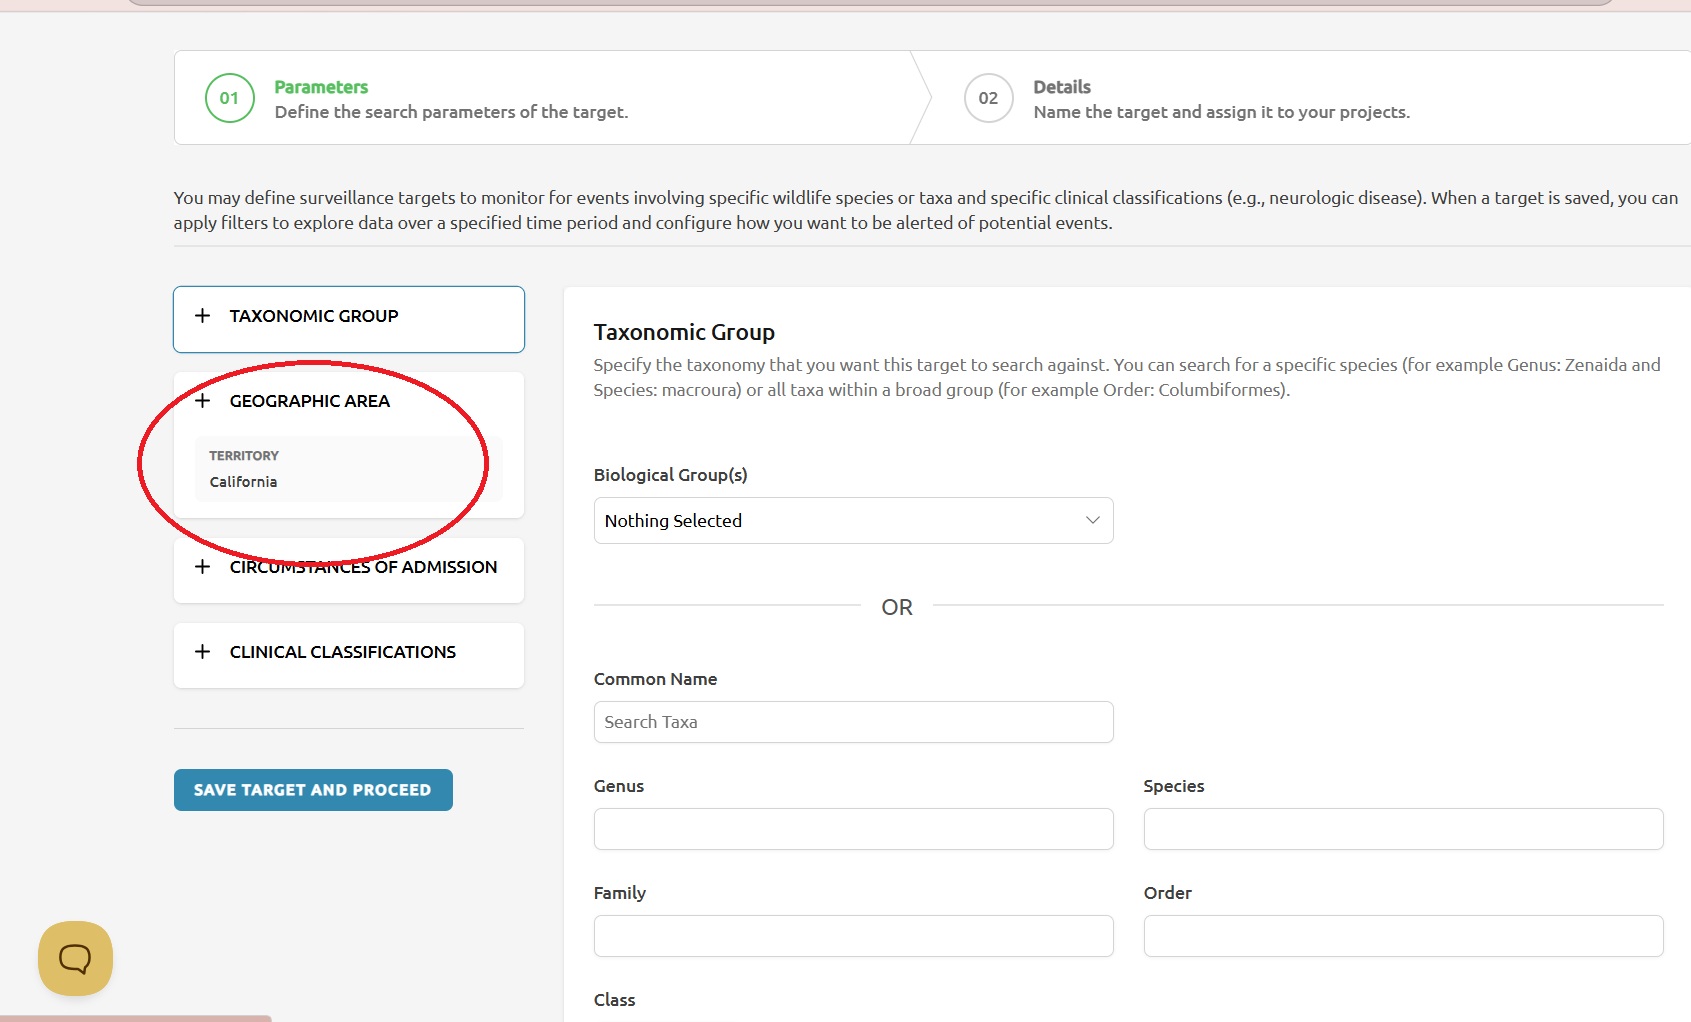
You can specify a county or region within your territory, or leave these blank if you are interested in territory-wide alerts. If you select one or more counties or regions, the algorithms will search and detect anomalous events in that specified geographic area. Click on the Save Parameter button at the bottom right of the screen once you have entered the geographic area information.

A surveillance target that includes information for the taxa parameter only (i.e., no information included for circumstances of admission or clinical classifications) will allow you to detect anomalies in the number of animals in that species or taxa group presenting to wildlife rehabilitation organizations across the network regardless of the cause or underlying factors associated with that event.
If your goal is to detect anomalies associated with a specific clinical presentation for a taxa or species (e.g., seabirds with neurologic disease), you can add details for the Circumstances of Admission and/or Clinical Classifications parameters.
Step 6
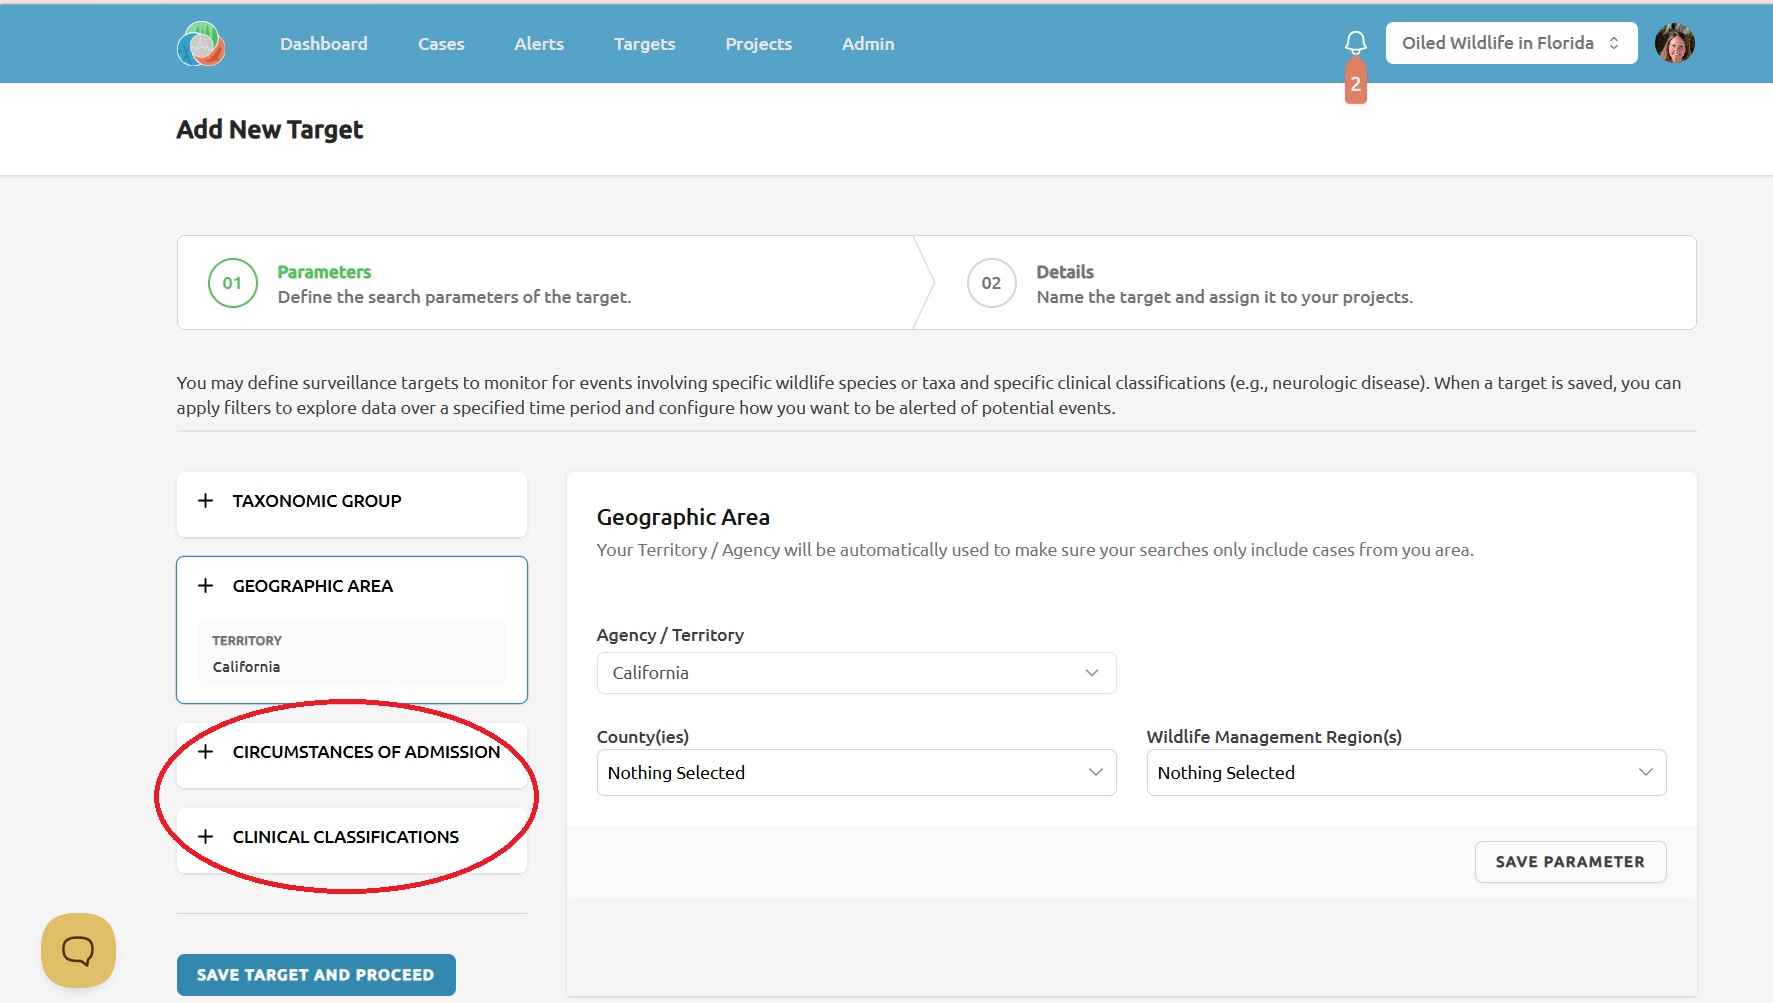
Click on the Circumstances of Admission parameter button to narrow the target by why the animal was admitted (e.g., animal interaction, collision, contamination, illness). Click on the Clinical Classifications parameter button to narrow the target by the clinical presentation (e.g., respiratory disease, dermatologic disease, neurologic disease).
Step 7
On each of these two cards you can:
- Select one or more values from the dropdown to include in the target.
- Switch the match mode between Match Any (OR) and Match All (AND). Match Any finds cases that match at least one of your selections; Match All requires every selection to be present on the same case.
- Add exclusions using the exclusion controls beneath the selections — cases matching any exclusion will be filtered out of the target.
Select one or more of the 11 clinical classifications in the dropdown menu (see table below for definitions). Click on the Save Parameter button at the bottom right of the screen once completed.

Definitions for clinical classifications:
| Clinical Classification | Definition |
| Neurologic disease | Conditions affecting the central and peripheral nervous systems. |
| Respiratory disease | Conditions affecting the organs and tissues that make gas exchange possible and includes conditions of the upper respiratory tract, trachea, bronchi, bronchioles, alveoli, pleura, and pleural cavity. |
| Gastrointestinal disease | Conditions affecting the gastrointestinal tract, namely the esophagus, stomach, small intestine, large intestine and rectum, and the accessory organs of digestion, the liver, gallbladder, and pancreas. |
| Hematologic disease | Conditions affecting the red blood cells, white blood cells, platelets, blood vessels, bone marrow, lymph nodes, spleen, and the proteins involved in bleeding and clotting. |
| Dermatologic disease | Conditions affecting the skin, fur, and feathers. |
| Ocular disease | Conditions affecting any of the eye components such as cornea, iris, pupil, optic nerve, lens, retina, macula, choroid, conjunctiva or the vitreous. |
| Nutritional disease | Pertaining to any disease resulting from an alteration in the processes involved in taking nutrients into the body and assimilating and utilizing them or from deficiencies or excesses of specific feed nutrients. |
| Urogenital disease | Conditions affecting the urinary tract and reproductive system. |
| Physical injury | Injury caused by trauma from an external force (mechanical, thermal, electrical, chemical) |
| Nonspecific | Clinical presentation not assignable to a particular category or classification. |
| Clinically healthy | No abnormalities/clinical signs on physical examination. |
The clinical classifications are assigned to each case using natural language processing models based on the physical examination findings and circumstances of admission for the animals upon arrival to the wildlife rehabilitation organization.
Step 8
Once you are done with all the parameters you want to include, click the Save Target and Proceed button.

On the page for Target Details, you can specify the details of the target. Each target will automatically be assigned a Target Name that describes the target (e.g., sea birds, sea birds with neurologic disease). It is not required, but you can also include a Target Description that provides some additional context on the goal or objective for defining the specific target (monitor for potential red tide events among seabirds in Southwest Florida). You can also add the target to a Project (e.g., HAB monitoring). See section on How to set up a Project for more information on projects.

Step 9
Lastly, click the Save and Go to Target button in the bottom right.
Once on the target, you can choose which members of your team (including yourself) receive the Threshold Exceeded and Summary Report emails by clicking the Notifications tab. A target you create is automatically added to your team; for a target created by someone else, the Subscribe to Target button at the top of the page adds it to your team.
