Labs
In this tutorial, you will learn how to store lab values on your patients for easy reference.
About the Labs Extension
While you can store lab values on your patients by writing their lab results in the Continued Care - Care Log, searching for specific lab details later on can be challenging this way. When you activate the Labs Extension, the data will be not only be listed in the patient log, but also on a separate panel in the patient record. This panel includes labs for all the common tests done in wildlife rehabilitation. The advantage of using the Labs Extension is that the labs will be presented in a clean and orderly way, so you will get a complete overview of all the lab work you have done on the patient. Plus, the data is more searchable which will make it more useful for you later on.
Activating the Labs Extension
Only users with Admin status can access the Extension Features in Settings.
Step 1
Visit https://www.wrmd.org/signin and log into your account using the username and password that you registered with.
Step 2
To access your account settings, click on your avatar in the upper right corner and choose Settings from the drop-down menu.

Step 3
On the sidebar, click on Extensions.

Step 4
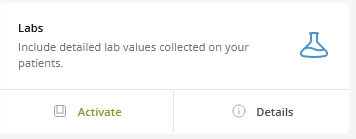
Activate the Labs Extension by clicking the Activate in the Lab section. Once activated, it will always be available until you deactivate it by clicking the Deactivate button which appears upon activation. You can access the Labs Function through any Patient Record by clicking the More dropdown and choosing Lab Reports.
Using the Labs Function
Step 1
Visit https://www.wrmd.org/signin and log into your account using the username and password that you registered with.
Step 2
Open the Patient Record of the animal that you will be examining. Click on the More tab and choose Lab Reports from the dropdown menu.

Step 4
The Lab Reports page displays cards for all the common tests used in wildlife rehabilitation. The lab types available are:
- Blood Chemistry
- CBC (Complete Blood Count)
- Cytology Analysis
- Fecal Analysis
- Toxicology Analysis
- Urinalysis
- Other
To add a new lab result, click the Add Lab Results dropdown button and choose the type of test from the menu. The form for that test type will open.
If you wish to edit any completed lab, click on the test entry to expand it and then click the edit icon.
If you wish to delete labs, click the delete icon for that entry.
In addition to being listed under the Lab Reports tab, all lab information will filter chronologically into the Patient's Record under the Continued Care tab and Care Logs.
Step 5
The data fields in each lab test are unique to that kind of test. There are no required fields except for the date (this is because we don't know what you have available in your clinic). If you don't enter a date, it will defer to the date you are entering the information.
For whichever test you choose, add the date, the results of your lab work in the appropriate field, and include the name of the person that did the lab work.
Step 6
Click on the green Save Lab Result button.