Necropsy
In this tutorial, you will learn how to use the Necropsy extension to save Necropsy Reports on your patients.
Activating the Necropsy Extension
Users with Admin status can access the Extension Features in Settings.
Step 1
Visit https://www.wrmd.org/signin and log into your account using the username and password that you registered with.
Step 2
To access your account settings, click on your avatar in the upper right corner and choose Settings from the drop-down menu.

Step 3
Click on the Extensions link.

Step 4
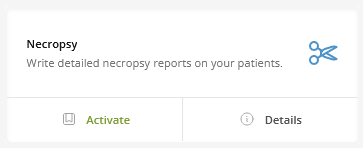
Activate the Necropsy Extension by clicking the Activate in the Necropsy section. Once activated, it will always be available until you deactivate it by clicking the Deactivate button which appears upon activation. You can access the Necropsy function through any Patient Record by clicking the More dropdown in the patient navigation tabs and choosing Necropsy. Details on that are forthcoming.
Using the Necropsy Function
Step 1
Visit https://www.wrmd.org/signin and log into your account using the username and password that you registered with.
Step 2
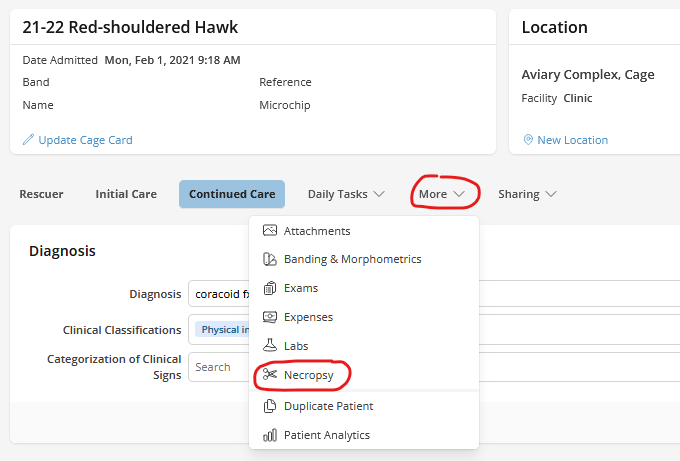
Open the Patient Record of the animal that you will be examining. Click on the More tab and choose Necropsy from the dropdown menu.
Step 3
Fill in the following sections
- Necropsy
- Mandatory fields include the date of necropsy and prosector. This section also includes carcass condition fields (photos collected, radiographed, frozen, scavenged, discarded after necropsy).
- Morphometrics
- include information on weight, measurements, sex, age, etc.
- Body Systems
- indicate what was examined and if there were any abnormal or insignificant findings
- Summary
- include a summary of your findings and any samples collected.
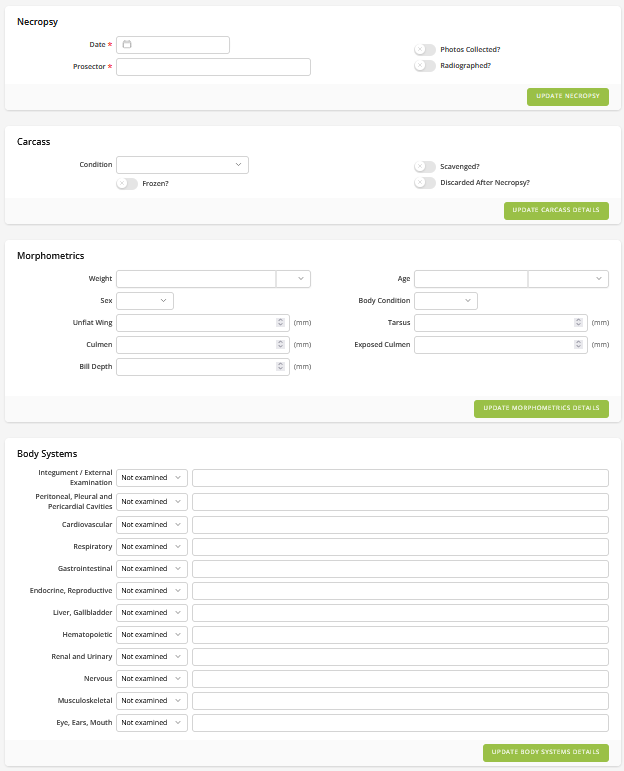
Step 4
Click the green Update Button in each section you evaluated. Now you have a Necropsy report attached to your patient's record.
Printing a Patient Record and Necropsy Report
Step 1
Visit https://www.wrmd.org/signin and log into your account using the username and password that you registered with.
Step 2
Open the Patient Record of the animal whose Necropsy Report you want to print.
Step 3
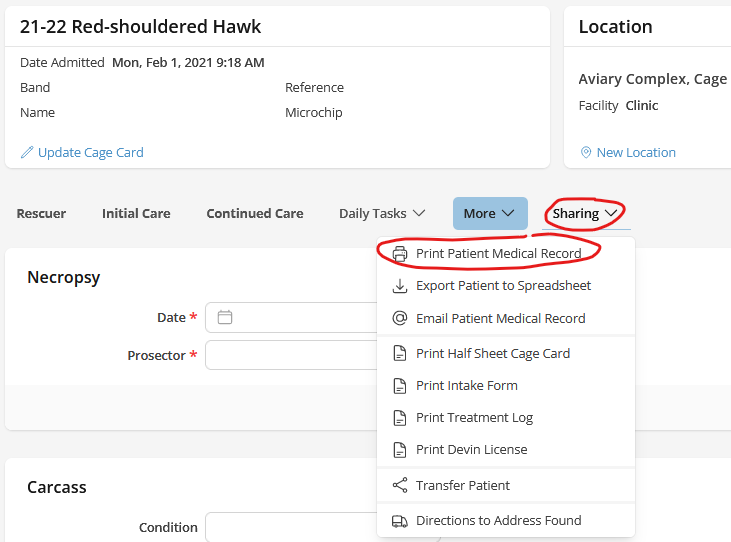
Click the Share Patient button at the top right of the patient page to open the sharing dropdown menu.
Step 4
In the dropdown menu, click Print Necropsy Report. The Necropsy Report will be downloaded to your computer as a PDF for printing.
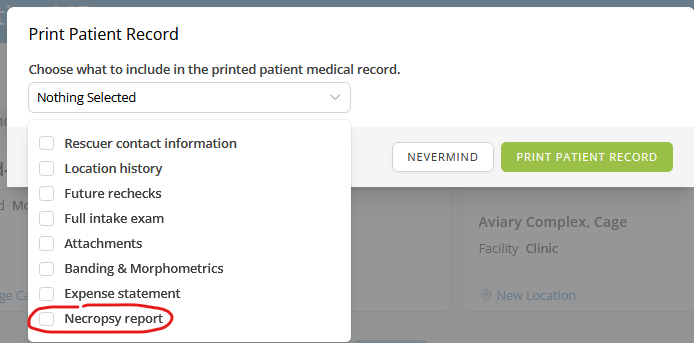
This method will only download the Necropsy report, not the entire record of the animal. If you want the Necropsy Report and the affiliated Patient Record, use Print Patient Medical Record from the same Share Patient dropdown menu.