Updating Your Account Settings
Keeping your account settings current will help customize your WRMD account to meet the specific needs of your center.
Note: Only users with Admin access are able to update the Account Settings.
Step 1
Visit https://www.wrmd.org/login and log into your account using the username and password that you registered with.
Step 2
To access your account settings, click on your avatar in the upper right corner and choose Settings from the drop-down menu.

Step 3
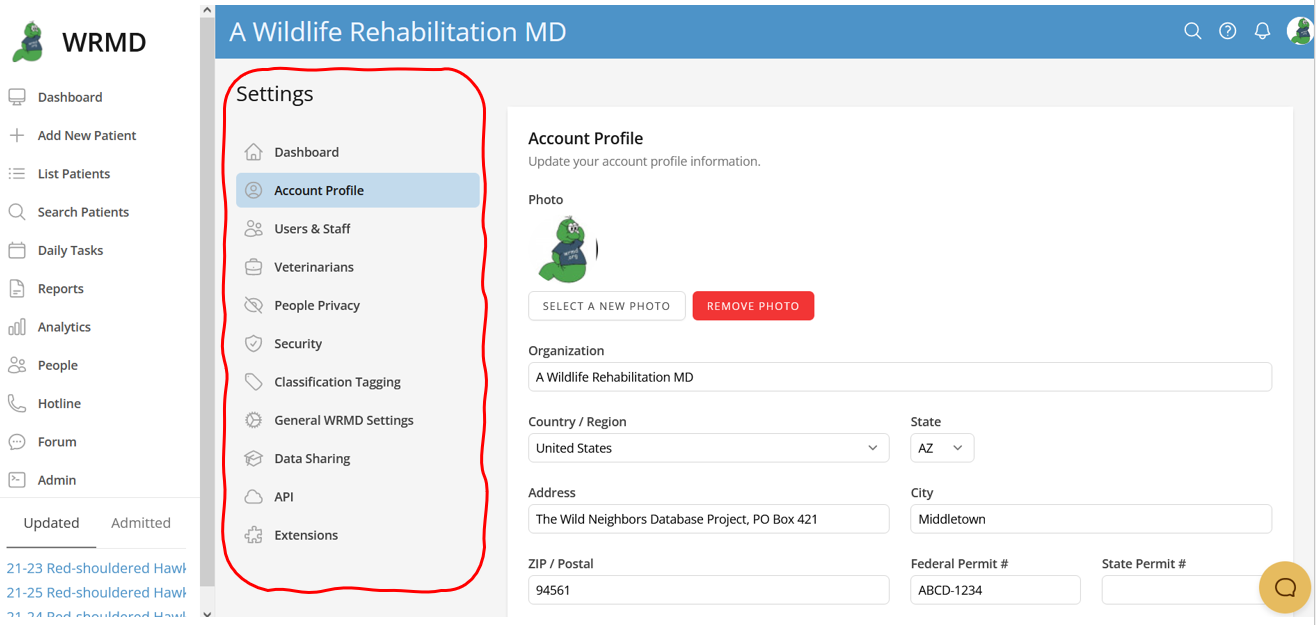
You can modify or customize any of the setting categories listed in the sidebar.
- Organization Profile:
- Account Avatar: Update or modify the logo or icon of your organization
- Organization Information: Add or modify the name, address, country, and permit number of your organization.
- Contact Details: Update any contact information
- Localization: Update the time zone or language for your specific location and preference.
- Users and Staff
- Users & Staff: Add or modify users to your account.
- Veterinarians:
- Add or modify veterinarians here.
- People Privacy
- Add or modify the user's permission settings. Only super admins are allowed access to private information by default. No other user has access to information on people, volunteers, donors, etc.
- Security:
- Modify restriction settings.
- Classification Tagging:
- Update any changes to the classification system.
- General WRMD Settings:
- Customize how your account functions and displays information.
- Generic Settings: Adjust some generic behavior on your account such as columns shown when listing patients.
- Care Log: Refers to what you want to access first in the care log. It also includes specifications for who can access or edit these care log entries. It is a type of permission setting.
- Your Facilities Locations: Make changes to locations where you house your patients in your facility.
- Data Sharing
- Modify changes you'd like to make in sharing your data with other research organizations.
- API:
- Manage API access for your organization.
- Extensions:
- Activate or deactivate certain extensions.
Step 4
Be sure to click the green Update button in the respective section to save your updates.